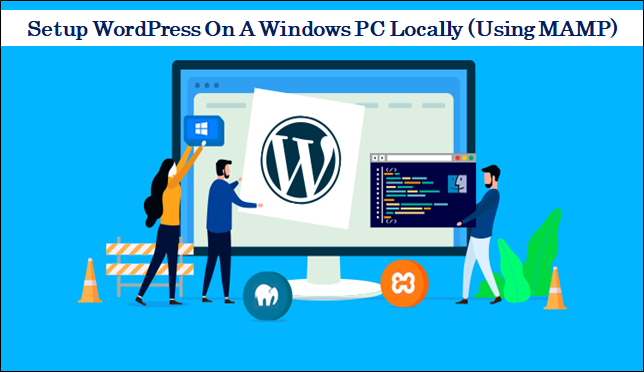
Install WordPress Locally Using Mamp on your Windows PC is definitely the best and most helpful decision that will benefit you in various different areas it assists you to develop and test websites after it is installed on your windows and also allows you to keep your work private. It is also independent of an online connection which basically means won’t need to go online to work on your tasks and also is having high performance with a low-cost advantage.
A local WordPress installation also enables you by stopping any changes that could potentially have an impact on your site. This article includes all the things that will show you how to install and set up WordPress locally on Windows in a very elaborative step-by-step process. Check out customizable and premium WordPress themes on VWthemes today to avail all of them at discounted prices.
The initial step would be to use MAMP to set up a local web server on your PC and then you should download and install WordPress. Let us begin to learn how to install WordPress themes locally on windows.
Why Do We Really Need Install WordPress Locally Using Mamp?
There are many various reasons and advantages for the users to Install WordPress on a Windows Locally like:
Working on your new website design in a local hosting environment ensures privacy. This is great for web designers or developers working on websites for clients who do not want the site to be accessible until the big reveal.
- Testing – If your website is always suffering compatibility issues or you aren’t quite pleased with the design, you may build a clone of your site and host it locally. Then you may test any plugin or theme problems that are causing issues, as well as redesign your site at your leisure.
- Work Off The Computer – You may work on your test website anywhere and where you like – you don’t even need to be connected to the internet – if you create a hosting environment on your computer. For those who want to experiment with WordPress and create their own topics or plugins, this is a great choice.
Let’s get into the process of how to Install WordPress Locally Using Mamp on Windows:
Step 1: You need to quickly Get MAMP and install it on your computer
As mentioned earlier first and foremost step For Install WordPress Locally Using Mamp on your Windows PC is to have to set up a local hosting environment by utilizing MAMP. What is MAMP?
MAMP is basically a free and premium local server environment that can be deployed on macOS and as well as Windows.
MAMP has a free edition that has all of the tools that come in handy when you need to test and develop WordPress on your PC.
MAMP also has a pro edition that is packed with additional features and capabilities. Such features include functions like the ability to establish a distinct hosting environment for each web project and as well as to import existing WordPress sites from live servers. Also, you will have the ability to publish projects directly from MAMP PRO to your live server.
When you install MAMP, you will need to go to the MAMP website’s Download page. Select the option for the Free Download and then select > Download MAMP and MAMP PRO 4.1 (Windows) option.
Step 2: Launch MAMP on your computer
So after you have downloaded it quite evident that the next step would be to launch MAMP on your PC. You will then need to choose to select Start Servers from the MAMP icon that will now appear on your desktop.
Once Apache Server and MySQL Server are enabled by you, you will need to select the Open WebStart Page option. The homepage of MAMP will be clearly displayed on the browser which indicates that MAMP has been successfully installed.
You may find the specifics of your MySQL connection, including your username and password, by scrolling down the page. Take note of this information since you will need it later when you connect your local database to WordPress.
Step 3: Make a New Database For Your WordPress Demo Site
To Install WordPress Locally Using Mamp, This step allows you to build a new database in which WordPress will keep all of your site’s back-end data, such as posts, pages, options, settings, and menus.
The database must be created with the phpMyAdmin program, which is included with your MAMP installation. Go to the top menu bar of your MAMP home page and select the Tools > phpMyAdmin button to start the software.
Click the menu of the databases in the phpMyAdmin application and then locate at the top of the screen the Creating database section. Give a name to your new database, assign utf8 general ci to the collection and click on Create.
Step 4: Install your PC with WordPress
Installing WordPress on your PC is the next step. Go to the downloading page of WordPress.org and click the Get WordPress > WordPress download option.
You will then have to unpack the folder and extract the contents after downloading WordPress to your Windows PC.
Step 5: Install WordPress to htdocs MAMP
You now need to transfer WordPress into the HTML docs folder of your MAMP installation. Move the cursor to the MAMP > HTML docs, and copy the WordPress un-zipped folder (typically the C drive). Copy and add to the HTML docs folder the WordPress folder. This folder is named in a WordPress URL (e.g. localhost) and is under the WordPress folder. You may rename the folder to anything you want (and subsequently the URL). For instance, the test site folder was renamed.
Step 6: WordPress installation on Windows PC locally
Ultimately, Install WordPress Locally Using Mamp it is possible to install WordPress on a local server. Enter the URL of your local WordPress site in the address field of your browser. I used the localhost/test URL, as seen in the figure below. If your WordPress folder has not been renamed, type into localhost/WordPress.
Now you will need to execute the directions on the screen. Choose your favorite language first. You need to fill out some information about the new database that you built. Database name – The name that you selected when you set up the new database for your phpMyAdmin test site.
Database username and password—The foundation of both the username and the password. This information may be found on the MySQL section of the MAMP installation page.
- Database Host – Localhost This information is also available on the MAMP installation page. You are now ready to install WordPress on your own server. To have this acquired, you will need to click on the Run button. In order to do so. You will need to type in your test site with details. Such of these details can be easily adjusted later if you have any requirements to do so. Therefore, do not worry about the site title or username that you have chosen. Click on installing WordPress. Here you can easily log in to your WordPress test site through the localhost/test site/wp-admin URL (replace test site with the name of your WordPress folder).
Conclusion
Evidently, Install WordPress Locally Using Mamp on windows or on a local web server is a very simple and seamless procedure you can perform anytime. As clearly mentioned in the article, it’s quite simple to quickly and easily install MAMP while also creating a database for your test site. Following the previous step, the next step would be to download and install WordPress by just using these six steps mentioned above. Along with this have a look at the Pros And Cons Of WordPress Themes.
Along with how to Install WordPress Locally Using Mamp, Check out Our WP theme bundle is also available at just $99.


