
Welcome to the delicious world of online baking! If you have ever dreamt of sharing your tasty treats with the world, you are in the right place. In this blog, we will walk you through the easy-peasy process to create a bakery website in just 10 steps. Imagine your mouthwatering pastries and scrumptious bread showcased beautifully online, inviting customers to savor every bite. Whether you are a pro looking to expand or a home baker eager to go digital, we have your back.
From picking the perfect domain name to using WordPress for your website, each step is a simple ingredient in the recipe to create a bakery site. We will explore best WordPress themes, guide you through installation, and make customizing a piece of cake. With WooCommerce, your bakery will become an online shop effortlessly. Get ready to add your personal touch, creating a tasty online presence that sticks in people’s minds. Let’s start this digital baking adventure together!
Let’s create a Bakery Website in 10 Simple Steps:
1. Choose a Domain Name and Hosting Service:

Establishing your online bakery begins with crafting a unique digital identity. Choose a memorable domain name that resonates with your brand and target audience. Confirm its availability through online tools. Then, opt for a hosting service that suits your bakery’s needs and budget. Register your chosen domain through the hosting provider, create and complete the hosting account registration, and customize domain settings in the hosting control panel. Ensure a seamless domain-hosting connection through a basic test.
2. Install WordPress:
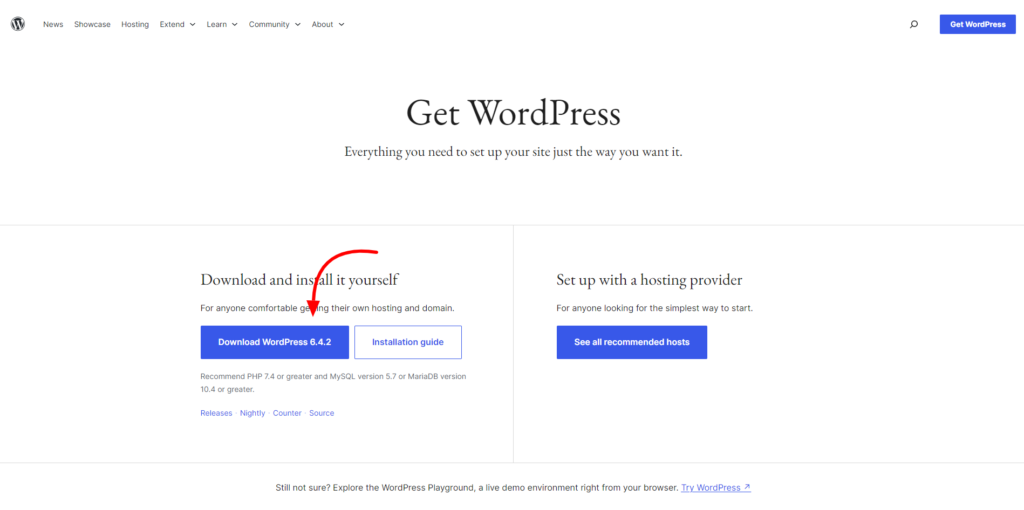
Choose a web hosting provider aligned with your needs and use their tools for a smooth WordPress installation. Create a strong username and password for your WordPress dashboard, providing the foundation for your website. Access the dashboard to begin customizing your site with themes, plugins, and engaging content.
3. Choose a WordPress Theme:
Log in to your WordPress dashboard and explore themes under the “Appearance” tab. Browse available themes or add new ones. Consider specialized bakery themes to enhance your bakery’s visual appeal. VW Themes offer specialized bakery themes for WordPress, check them out to help create a bakery website.
Bakery WordPress Theme:
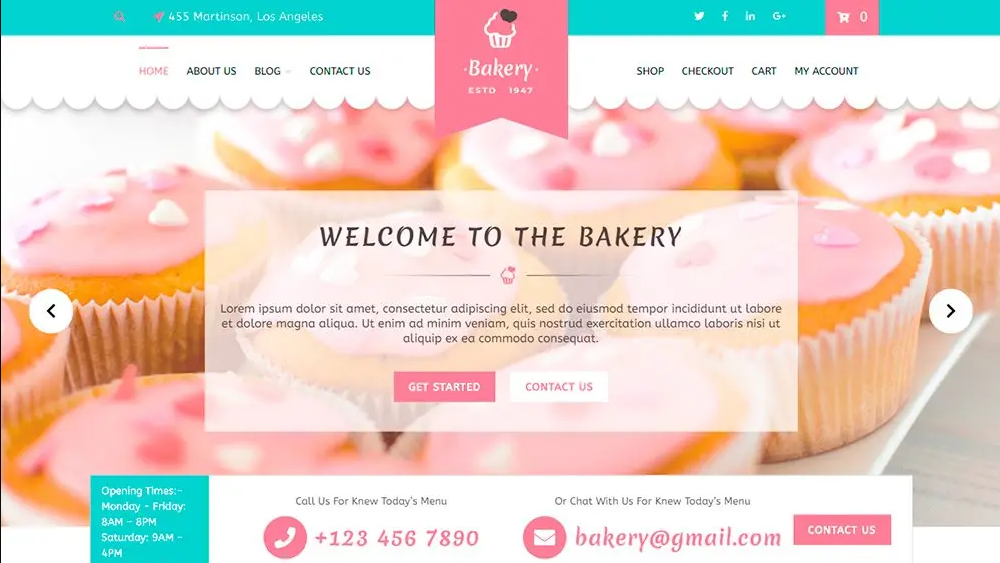
The Bakery WordPress Theme offers a delightful blend of aesthetics and functionality, making it the perfect choice for your bakery’s online presence. A visual treat awaits your online visitors as they navigate through a website designed to showcase your delicious creations. This theme highlights the charm of your bakery, offering a seamless and visually pleasing experience that mirrors the warmth of your physical storefront. Elevate your online presence with an engaging design that invites customers to explore, savor, and connect with your treats. Set the tone with personalized site titles, taglines, and logos, and keep users engaged with sticky posts and accessible comment threads.
Bake Shop WordPress Theme:
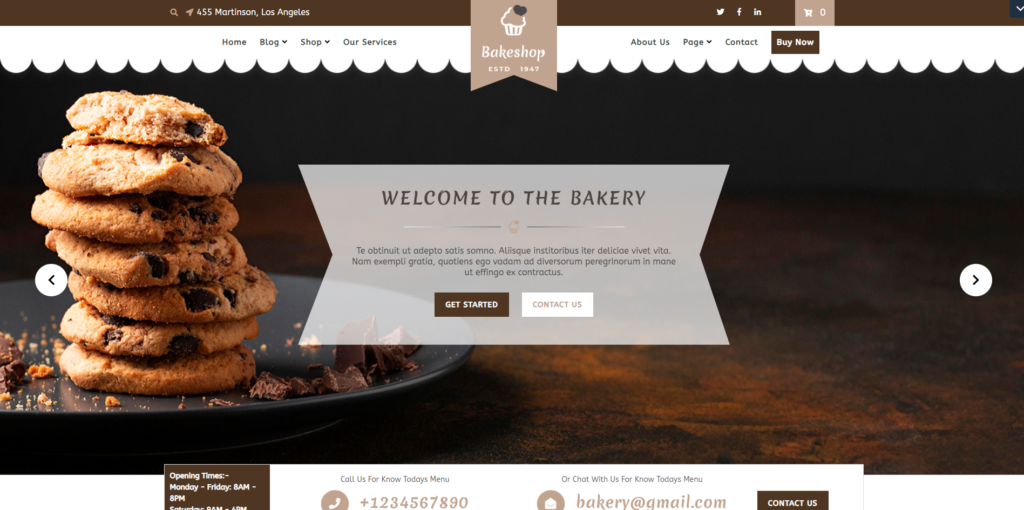
The Bake Shop WordPress Theme is a comprehensive solution designed for growing websites, particularly in the bakery domain. where every click leads to a visual feast of tempting treats. The Bake Shop WordPress Theme is more than a website; it’s an immersive experience that brings the essence of your bakery to life. With a user-friendly design and attractive visuals, this theme invites your audience to indulge in the world of your baked wonders. this theme ensures your bake shop’s online presence is as delightful as your creations.
4. Install and Activate Your Theme:
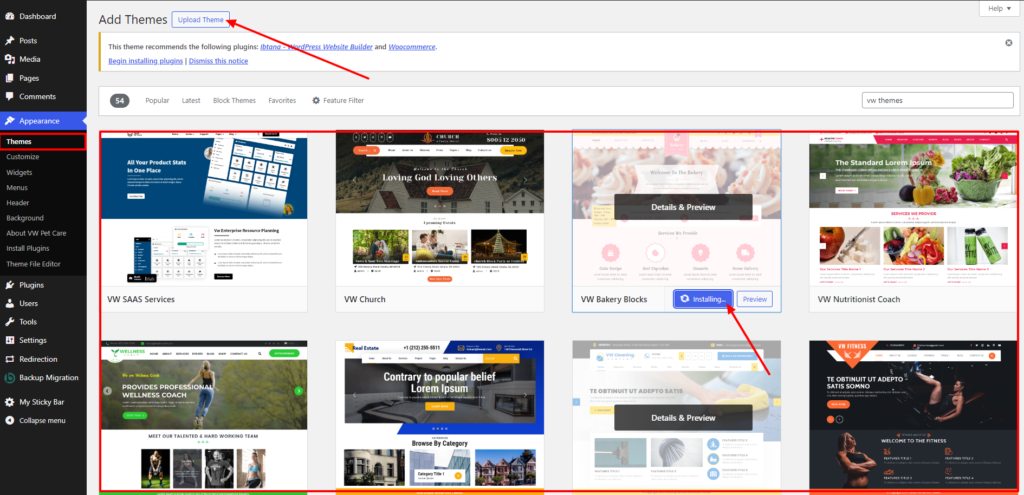
Download your chosen theme file and seamlessly integrate it into your WordPress dashboard. Navigate to “Appearance” and “Themes,” click “Add New,” and choose “Upload Theme.” Install and activate the theme to add a personalized and engaging touch to your online bakery.
5. Import Demo:
Navigate to theme options in your WordPress dashboard and find the demo importer tool within the theme settings. Select your preferred demo to initiate the import process. Allow the importer to finish importing demo content, settings, and images. Customize settings to match your preferences and activate additional theme features or plugins. Preview your site, save changes, and set the stage for your virtual showcase. This leads you to halfway of the process to create a bakery website.
6. Customize Content as per Requirement:
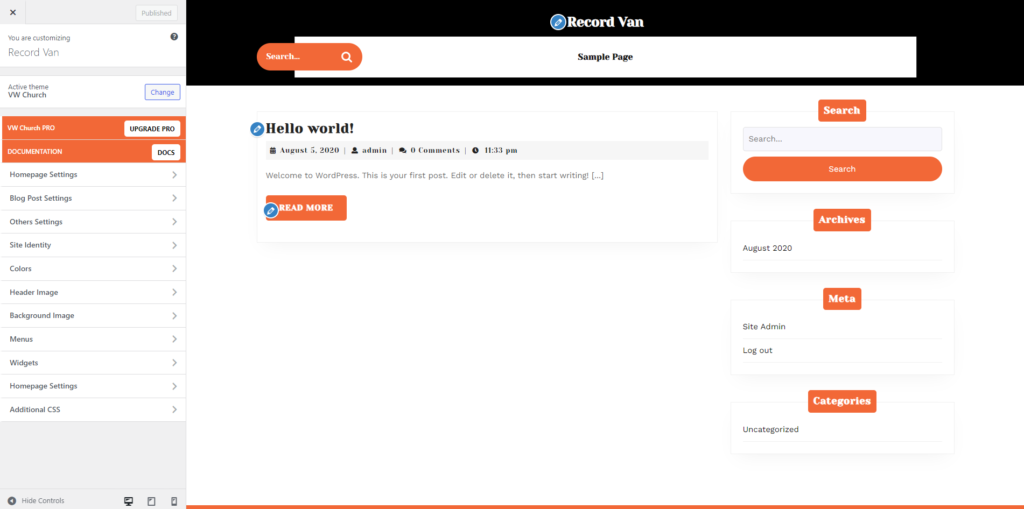
Log in and go to “Appearance” in the WordPress dashboard, selecting the “Customize” option. Edit site title, tagline, and upload a logo under “Site Identity.” Adjust color schemes and font styles under “Colors and Fonts.” Customize headers, footers, create menus, and configure homepage settings. Optionally set background images or add custom CSS for advanced styling. Preview changes before publishing, then click “Publish” to add the final changes.
7. Install and Activate WooCommerce Plugin:
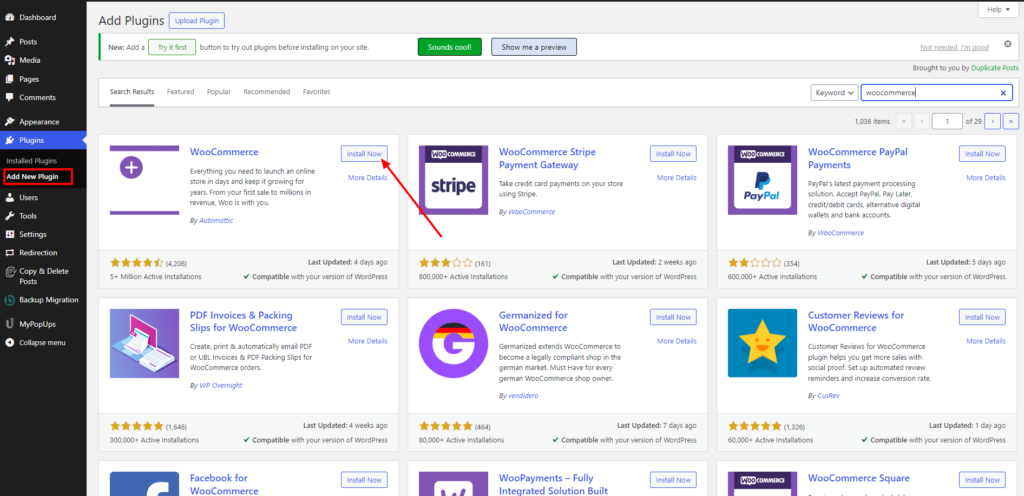
Transform Your Bakery into an Online Shop by Installing and Activating WooCommerce Plugin start by Loging into your WordPress admin, navigate to Plugins > Add New, search for “WooCommerce,” and click “Install Now.” Activate WooCommerce and follow the setup wizard to configure location, currency, shipping, tax, and payment settings. Review and adjust general, product, and checkout settings under WooCommerce > Settings. create a bakery website first product under Products > Add New and test transactions to ensure a smooth checkout process.
8. Add Products:
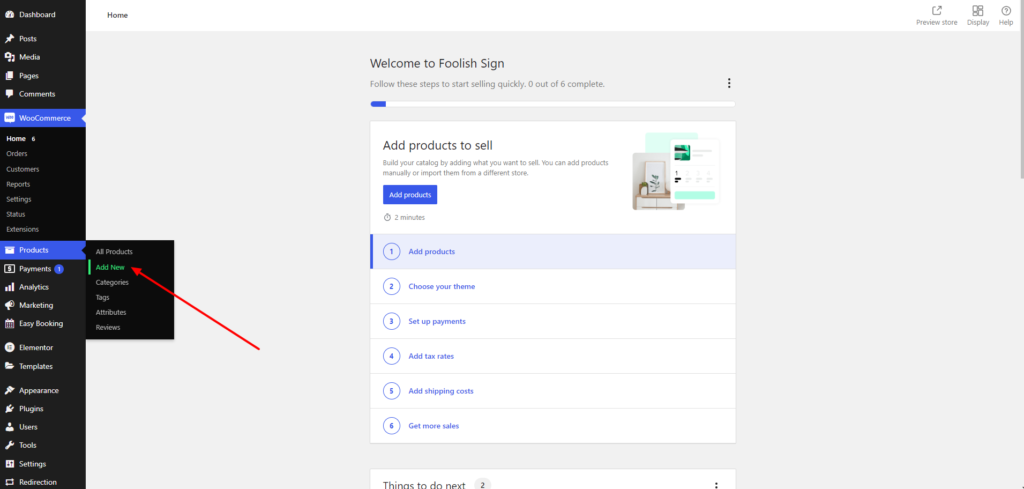
Log in to WordPress, go to WooCommerce, and click on “Products.” Hit “Add New” to create product entries with details like title, description, price, and images. Assign categories and tags, manage stock levels, set inventory details, and configure shipping options. Cross-sell or upsell related items and choose where the product should appear. Click “Publish” to showcase your bakery’s offerings virtually.
9. Set Up Payments and Test Your Website:
Access WooCommerce settings, navigate to the “Payments” tab, and set up preferred payment gateways like PayPal or Stripe. Enable test mode for payment gateways to avoid real transactions during testing. Simulate a purchase using test card details, ensuring a smooth online checkout experience.
10. Launch Your Website:
Review your website for errors, test all functions, and ensure mobile responsiveness. Optimize for SEO using relevant keywords and install an SSL certificate for security. Set up Google Analytics for website analytics, perform a complete backup, and promote your launch on social media and newsletters. Track loading times, user engagement, and provide accessible support options. Celebrate success, gather feedback, and embrace the beginning of your delightful digital baking journey.
Conclusion :
Congratulations on completing to create a bakery website! With 10 simple steps, you have crafted a visually enticing website that showcases your mouthwatering treats. From choosing the perfect domain to adding irresistible products, your digital baking adventure is now live. Your website is like a digital shop window, inviting people to check out and enjoy your delicious creations.
It’s not just a website; it is a fascinating experience. Share the joy on social media, gather feedback, and celebrate the sweet success of your progress. This is not the end but the beginning of a delightful chapter where every click, every visit, and every satisfied customer contribute to make your online bakery successful. Cheers to a sweet online journey filled with success, satisfied customers, and delightful experiences!
To streamline the process even further, consider utilizing a WordPress theme bundle tailored for bakery websites. With its pre-designed templates, built-in features, and customization options, a WordPress theme bundle can expedite the creation process while ensuring your bakery website stands out. Embrace these steps, leverage the power of a WordPress theme bundle, and watch your bakery’s online presence thrive.


