Fonts play a crucial role in web design, significantly impacting the overall appearance and user experience of a website. They also influence readability, branding, and engagement. Imagine visiting a website with dull, hard-to-read fonts, that sounds like an unappealing browsing experience, right? In contrast, clear and stylish typography can make browsing super easy for your website visitors. That’s why understanding how to change fonts in WordPress is essential for anyone looking to spruce up their online presence.
In this article, we’ll take you on a journey through the world of font customization in WordPress. You’ll learn the step-by-step process to transform your website’s typography, adding your own personal flair and style. Whether you’re running a blog or a business page, knowing how to change fonts will give your website a fresh, professional look. So, without wasting further ado let’s get started.
Why To Change Fonts In WordPress?
Before heading to the step-by-step guide to change fonts, let’s first understand the importance of changing fonts.
Changing fonts in WordPress can breathe new life into your website and enhance its visual appeal. By switching up the fonts, you can add a touch of personality and uniqueness to your site, making it stand out from the crowd. Different fonts convey different emotions and styles, allowing you to tailor the tone of your website to match your brand or content. Moreover, changing fonts can improve readability, making it easier for your site’s visitors to consume your content.
Clear, fancy fonts in WordPress can help retain visitors on your site longer, increasing engagement and potentially reducing bounce rates. Additionally, customizing fonts can contribute to better branding, creating a cohesive and memorable visual identity for your website.
How To Change Fonts In WordPress?
There are several different ways that you can utilize the change fonts on your WordPress website. All of them are mentioned below:
- Changing Using Theme Customizer
- Change Fonts Using a Plugin
- Changing Fonts Using a Theme Builder
- Utilize the Content Editor To Change Fonts
- Changing Fonts Using the WordPress Full Site Editor
1. Changing Fonts Using Theme Customizer
To change fonts in WordPress using the Theme Customizer, start by accessing your WordPress Dashboard. Now follow below steps:

- Once logged in, navigate to the Appearance section and click on “Customize.” This action will open up the Theme Customizer. It is your gateway to change various aspects of your website’s appearance.
- Within the Theme Customizer, look for the Typography or Fonts section. It might be labeled differently depending on your theme.
- Once you’ve found it, click on it to access the font customization options. After clicking on it you will be able to select and preview fonts.
- Most themes offer a range of font choices, allowing you to experiment with different styles until you find the perfect match for your website’s vibe.
- As you click through the font options, the preview window will update in real-time. It will give you a glimpse of how your site will look with each font selection.
- Once you’ve settled on a font that you love, it’s time to save your changes. To do that, simply click the “Save” or “Publish” button in the Theme Customizer.
- And, now your new fonts are live on your website for all to see. With just a few clicks, you’ve successfully changed fonts in WordPress, adding your own personal touch to your site’s design.

If you will to use your custom fonts, then go through our guide that will help you to know how to upload fonts to WordPress in simple steps.
2. Change Fonts In WordPress Using a Plugin

WordPress plugins offer a convenient way to expand your font choices beyond what’s available in your theme’s default options. Examples of popular font plugins include “Easy Google Fonts,” “Use Any Font,” and “Fontsy.” Each of these plugins offers unique features such as integration with Google Fonts, compatibility with custom fonts, and advanced typography controls. These plugins come packed with a variety of fonts and additional customization features. They allow you to fine-tune the typography of your website to your heart’s content. For this guide, we’ll use the Easy Google Fonts. To begin, you’ll need to install and activate the Easy Google Fonts plugin.
- Once activated, you’ll encounter the plugin’s welcome screen in your WordPress dashboard.
- Simply navigate to the ‘Go to Settings → Easy Google Fonts’ button to access the plugin settings.
- Upon clicking the ‘Manage with Live Preview’ button, you’ll be directed to the WordPress theme customizer, specifically in the ‘Typography’ tab.
- Alternatively, you can access the added fonts through Appearance » Customize in your WordPress dashboard, then proceed to the ‘Typography’ tab.
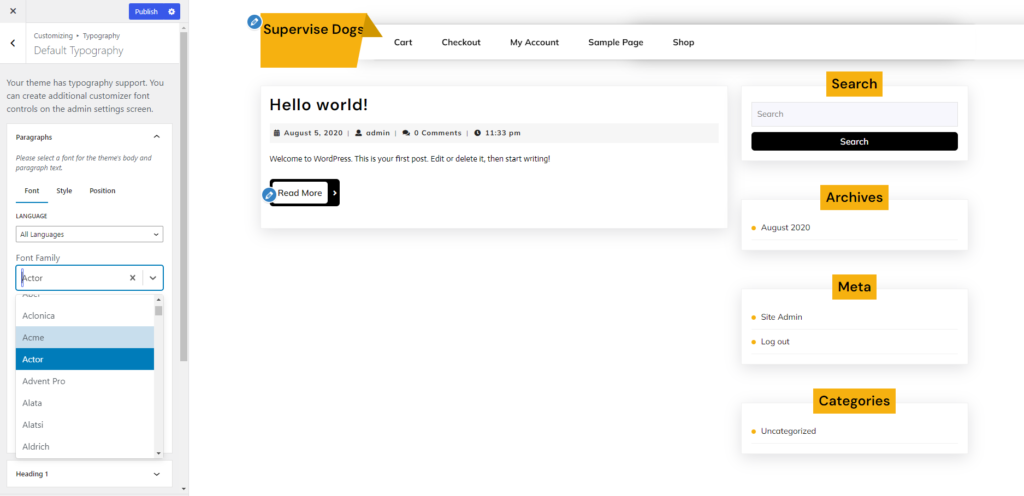
- Within the ‘Typography’ tab, you’ll find the option for ‘Default Typography.’ Clicking on it will you you to modify the font for every element on your website.
- For instance, if you wish to change the font for Heading 1, expand the options by clicking the arrow next to it. From there, select a font from the ‘Font Family’ dropdown menu.
- Repeat the process for other heading levels and paragraphs as needed.
- Once satisfied with your font selections, remember to hit the ‘Publish’ button to save your changes.
3. Changing Fonts Using a Theme Builder
Another way to change fonts in WordPress is by using a theme builder. There are several different theme builders available in the market such as Elementor, Beaver Builder, SeedProd, etc. For this guide, we’ll be using Elementor as an example. Here’s a step-by-step process:
- Begin by logging into your WordPress Dashboard and navigating to the page or post you want to edit.
- Once there, click on the “Edit with Elementor” button to enter the Elementor editor.
- Identify the text element on your page where you want to change the font. This could be a heading, paragraph, or any other text-based content.
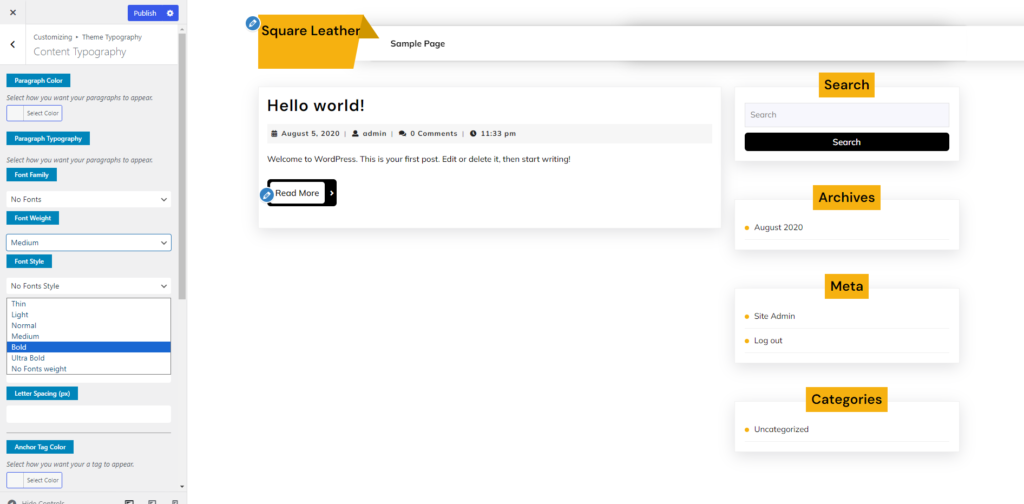
- Once you’ve selected the text element, click on the “Style” tab in the Elementor editor panel on the left-hand side.
- Within the Style tab, look for the Typography settings. This is where you can adjust various font-related attributes such as font family, size, weight, style, and spacing.
- Click on the dropdown menu next to “Font Family” to reveal a list of available fonts.
- Scroll through the options and select the desired font for your text element.
- Depending on your needs, you can further customize the font by adjusting settings like font size, weight, style, and letter spacing.
- As you make adjustments, Elementor provides a live preview of how the text will appear with the selected font and settings.
- Once you’re satisfied with the font changes, click the “Update” button to save your edits and make the new font live on your website.
4. Utilize the Content Editor to Change Fonts In WordPress
In the WordPress content editor, you have the option to adjust how your fonts look in specific blog posts and pages. However, it’s essential to note that this method only changes the font for that particular post or page. If you want the same customization across your entire site, you’ll need to manually repeat the process for each post, which can be time-consuming.
- To change the font using the WordPress content editor, start by editing a post or creating a new one. Once inside the editor, highlight the text you want to modify.
- Next, locate the ‘Typography’ section in the settings panel on the right-hand side.
- Then, click the three dots next to Typography and choose ‘Appearance’ from the dropdown menu. This action will reveal the Appearance settings under the Typography section.
- From there, you can select different font styles, such as bold, italic, or black, from the dropdown menu under Appearance.
- Additionally, you can adjust font size, letter case, color, enable drop caps, and more.
- Once you’ve made your desired changes, remember to update or publish your page to apply the new font styles.
5. Changing Fonts Using The WordPress Full Site Editor
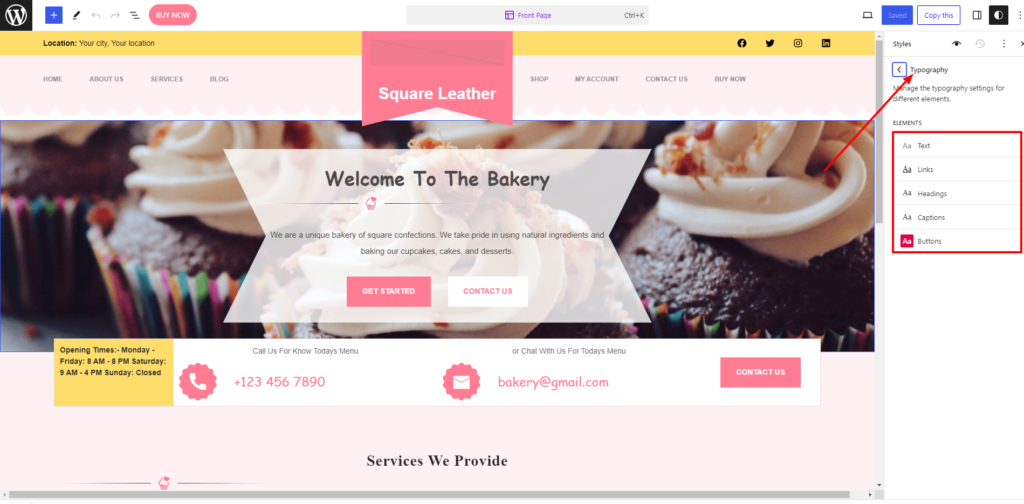
If you’re using a block-based WordPress theme like Bakery WordPress theme, then you can tweak your site’s font using the full site editor. This tool lets you customize your theme with blocks, just like editing posts or pages.
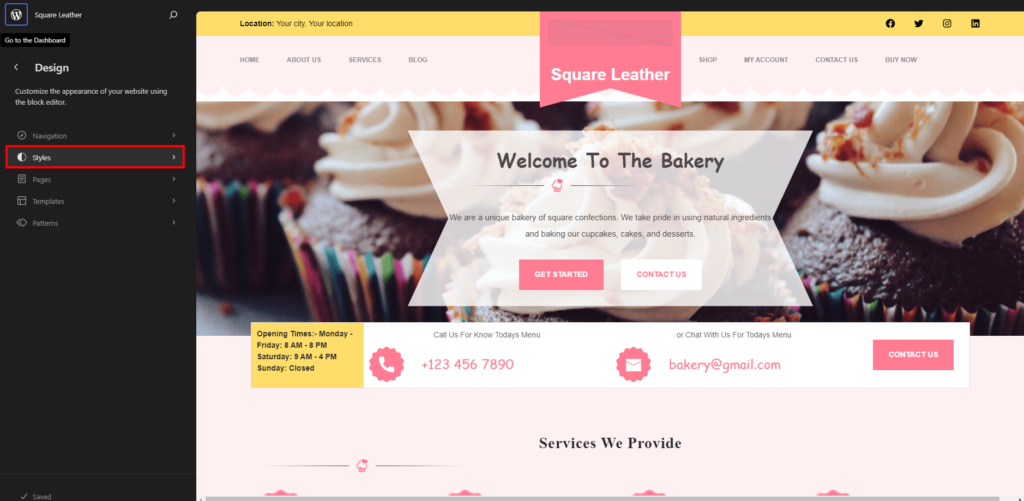
- To start, head to Appearance » Editor in your WordPress admin panel. This opens the full site editor for your theme.
- Click the Styles icon at the top right and then hit ‘Typography’. From there, pick elements like text or links to change their typography.
- For instance, select Text, and use the ‘Font Family’ dropdown to choose a new font. Once done, hit ‘Save’.
- Congratulations! You’ve now changed the font using the full site editor.
- Remember, you can also add custom fonts to your WordPress site and tweak them in the full site editor.
Searching for best Typography WordPress theme? then VW Themes is your spot. We’ve listed some of the best theme with professional fonts to elevate your website’s look. Try these themes at least once!
Conclusion
In conclusion, change fonts in WordPress plays a crucial role in enhancing the overall appearance and user experience of your website. By following the step-by-step guide provided, you’ve learned various methods to change fonts using WordPress themes, plugins, content editor, and the full site editor. Remember, experimenting with fonts is key to finding the perfect style that reflects your brand and captivates your audience. So, don’t be afraid to explore different options and get creative!
However, if you’re looking to take your font customization options to the next level, consider investing in a WordPress theme bundle. These bundles often include access to a wide range of premium fonts, along with other valuable resources like plugins, templates, and support services. With a theme bundle, you can unlock even more design possibilities and ensure that your website stands out from the crowd.
In closing, if you have any feedback or questions about changing fonts in WordPress, feel free to reach out. Your input is valuable and helps us improve our content to better serve you. Keep designing, keep innovating, and make your website stand out with beautifully customized fonts. Happy font styling!


