The world is all about building connections through emails and more. Setting up email marketing within your WordPress website is a powerful strategy to cultivate relationships, drive engagement, and ultimately achieve your business objectives. This step-by-step guide will walk you through the essential stages of integrating email marketing directly into your WordPress platform.
We'll explore the various options available, from leveraging dedicated WordPress plugins to seamlessly connecting with established external email marketing services. Each step is designed to be clear and actionable, empowering you to build your subscriber list, craft compelling email campaigns, and analyse your results – all within the familiar environment of your WordPress dashboard.
What is Email Marketing in WordPress?
Email marketing in WordPress refers to the practice of using your WordPress website to collect email addresses and send marketing communications to your subscribers. Instead of relying solely on external Top email marketing platforms, WordPress allows you to integrate these functionalities directly into your site through various methods, primarily using plugins.
Email marketing in WordPress leverages the flexibility of the platform and its plugin ecosystem to build and engage with your audience directly from your website. It's a convenient way to get started and manage basic email marketing activities, with options to scale and integrate with more powerful external services as your needs grow.
Why Email Marketing is Necessary?
Email marketing is necessary for a bunch of reasons, especially if you're running a website, business, blog, or even a YouTube channel. It’s one of the most effective ways to connect directly with your audience, right in their inbox.
Here’s why it’s such a powerful and necessary tool:
- Direct Communication Channel: You’re not at the mercy of social media algorithms. Emails convey your message directly to the subscriber without any middleman.
- High ROI (Return on Investment): Email marketing seeks highest ROI value in the digital marketing world. For every $1 spent, businesses can get up to $36 or more back on average.
- Build and Nurture Relationships: You can stay in touch regularly with your audience, build trust, and slowly guide them toward becoming loyal customers, clients, or fans.
- Drive Traffic Repeat: By sending newsletters or blog updates, you keep people coming back to your site, YouTube channel, or store.
- Boost Sales and Conversations: Promoting a product, service or any limited time offer becomes easier. Email campaigns can create urgency and drive people to take action.
- Personalization and Segmentation: You can customise your messages based on user behaviour (e.g., visiting a certain page, making a purchase), which makes your content more relevant and effective.
- Measurable Results: You can track open rates, clicks, conversions, and optimize over time. It’s data-driven marketing that works.
How do you set up email marketing in WordPress?
Step 1: Install and Set Up Contact Form 7

Contact Form 7 is one of the most widely used WordPress contact form plugins for its simplicity, flexibility, and compatibility with most themes and plugins. Before you can integrate email marketing into your site, you’ll need a reliable way to collect user information, and Contact Form 7 serves that purpose perfectly. It allows you to create unlimited forms with customizable fields, making it suitable for everything from basic contact pages to newsletter sign-up forms. The plugin supports text inputs, email inputs, checkboxes, radio buttons, and drop-down menus, all of which can be integrated into your email marketing platform through field mapping.
After installation, you’ll be able to manage your forms through the “Contact” section in your WordPress dashboard. Each form has a unique shortcode, which you can insert into any post, page, or widget. This shortcode dynamically renders the form on the frontend. It’s also important to understand that Contact Form 7 sends form data to your admin email by default. For this reason, it’s often paired with SMTP plugins to ensure reliable delivery, but that’s a separate optimization step. In this guide, we focus on integrating this form with a third-party email marketing platform to automatically build your mailing list.
Steps:

- Go to your WordPress dashboard.
- Navigate to Plugins > Add New.
- Search for Contact Form 7.
- Click Install Now, then click Activate.
- Go to Contact > Add New and build your form.
- Customize the form fields such as Name, Email, and Message.
- Save the form and copy the shortcode for later use.
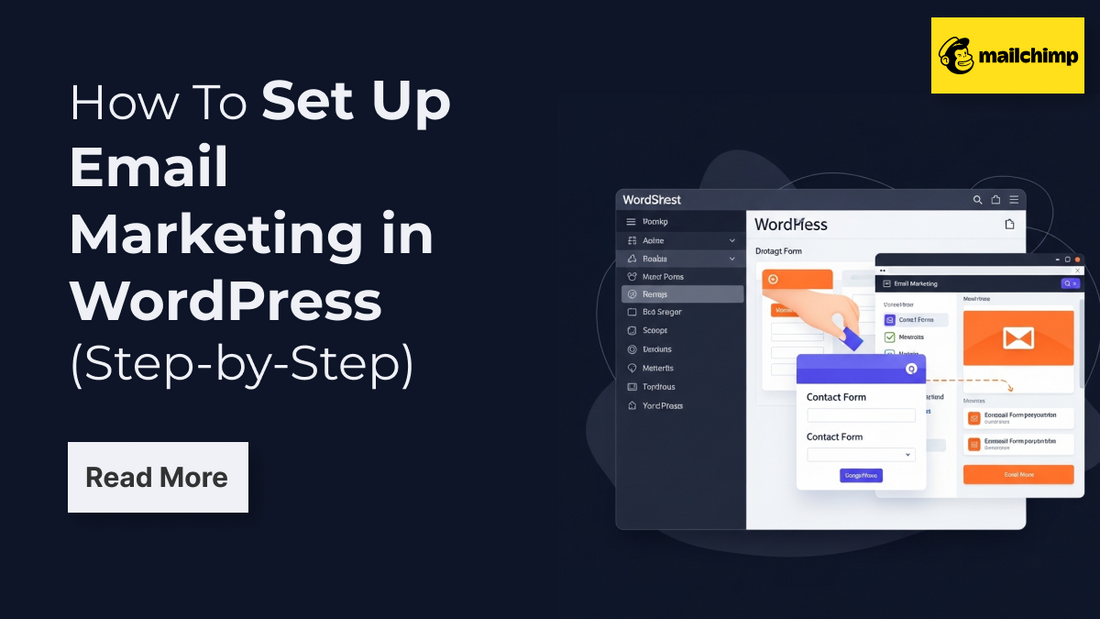
Step 2: Set Up a Mailchimp Account and Generate API Key

Mailchimp is one of the most popular email marketing services and is well-suited for small to mid-sized businesses. It offers automation features, audience segmentation, email templates, and integration capabilities including with WordPress. Before we can connect your WordPress form to Mailchimp, you'll need to set up your Mailchimp account and retrieve an API key.
An API key is a secure way for your website to access your Mailchimp account. It acts like a password that allows Various email marketing plugin for WordPress to talk to Mailchimp without exposing your personal login. Once you generate this key, you’ll plug it into the integration plugin so that any new subscriber from your form gets automatically added to your Mailchimp audience (previously called a list).
During this process, make sure to also create an Audience in Mailchimp. This is where all your email contacts will be collected. You can name this audience according to your website or campaign (e.g., “Newsletter Subscribers”).
Steps:

- Go to "mailchimp.com" and sign up or log in.
- From the dashboard, go to Audience > Audience Dashboard > Manage Audience > Settings.
- Create a new Audience if one doesn’t already exist.
- Click on your profile icon > Account > Extras > API Keys.
- Click Create A Key and copy the generated API key.
- Save this key you’ll need it in the next step.
Step 3: Install Mailchimp List Subscribe Form

Contact Form 7 doesn’t support Mailchimp out-of-the-box. To make the connection, we’ll need a third-party plugin called Mailchimp List Subscribe Form. This plugin bridges the gap between your form and Mailchimp by letting you map form fields (like Name and Email) to your Mailchimp Audience. If you are new to these things and just started your startup website then follow our detailed guide to Integrate MailChimp with WordPress.
The plugin provides options to enable double opt-in, assign users to groups/tags, and even log responses. It uses the Mailchimp API key to fetch your audience lists, then allows you to select which form connects to which list. Once integrated, every time someone fills out your Contact Form 7 form, their details are automatically added to Mailchimp no manual entry required.
This is a one-time setup process. Once configured, you’ll be able to link additional forms, use Mailchimp tags, and even trigger automations based on submissions. This step is essential to transform your simple contact form into a powerful email collection tool.
Steps:

- Go to Plugins > Add New in your WordPress dashboard.
- Search for Contact Form 7 Extension For Mailchimp.
- Click Install Now and then Activate.
- Go to Contact > Mailchimp in the dashboard menu.
- Paste your Mailchimp API key and click Connect.
- Wait for your Mailchimp audiences to load.
Step 4: Map Contact Form 7 Fields to Mailchimp Audience Fields

Once the plugin is connected to your Mailchimp account, the next crucial task is field mapping. This is where you tell the plugin which form fields should be passed to which fields in your Mailchimp Audience. For example, if your form collects a user’s name and email, you must map those to the corresponding “First Name” and “Email Address” fields in your Mailchimp list.
Accurate mapping is important if the fields aren’t mapped correctly, the data won’t transfer properly, and you may lose valuable subscribers. You also have the option to enable Double Opt-in, which means users will receive a confirmation email before being officially added to your list. This improves compliance and reduces spam signups. Additionally, you can add tags to users or assign them to specific groups if you want better audience segmentation in Mailchimp.
This step only needs to be done once per form, but if you change the fields in your form or update your Mailchimp Audience, you should return and re-map everything.
Steps:
- Go to Contact > Mailchimp in your WordPress admin panel.
- Click on the form you want to integrate.
- Choose the correct Mailchimp Audience from the dropdown.
- You will see your form fields listed alongside your Mailchimp fields.
- Map fields like
[your-name]to First Name,[your-email]to Email, etc. - Enable Double Opt-in if desired.
- Optionally, assign tags or groups for further segmentation.
- Save the changes.
Step 5: Design Contact Form with Contact Form 7

Designing and configuring your WordPress contact form is a critical step not only for gathering the right user information, but also for encouraging conversions through a clean and professional layout. In this step, your goal is to create a well-structured form that includes the necessary fields (such as name and email address) and aligns with the Mailchimp audience fields you plan to sync with. Using Contact Form 7, this process is straightforward but deserves attention to detail to avoid mismatches during integration.
Start by navigating to the Contact > Contact Forms section in your WordPress dashboard. When you edit or create a form, Contact Form 7 uses its own shortcode-based tag system. This allows you to add form elements like text fields, email inputs, checkboxes, dropdowns, and textareas. For Mailchimp integration, the most essential fields are the user’s name and email address, which are usually required by your Mailchimp audience.
It’s also a good practice to add a consent checkbox for GDPR compliance, which indicates that the user agrees to receive emails from you. This builds trust and ensures transparency. Additionally, use placeholder text or labels to clearly indicate what information is expected from the user. A clean layout, error validation messages, and an actionable Submit button are all part of this design phase. Once your form structure is in place, you can insert the form into any page or widget area using the shortcode and later map each field to Mailchimp during integration.
Steps:

- Navigate to Contact > Contact Forms in your WordPress dashboard.
- Click on Edit next to the form you’ve created (or create a new one).
- Use Contact Form 7 tags to add necessary fields such as:\n -
[text* your-name]for the full name\n -[email* your-email]for the email address\n -[checkbox opt-in use_label_element "Yes, I want to receive updates"]for email consent\n4. Add optional fields like message or phone number if required.\n5. Customize placeholder text and labels for clarity.\n6. Click Save to preserve your changes.\n7. Copy the form’s shortcode to use in the next embedding step.
Step 5: Embed the Contact Form on Your Website

With your form connected and mapped to Mailchimp, the next step is to make it live on your website. Contact Form 7 generates a shortcode for every form you create. You can place this shortcode on any page, post, or widget area using the WordPress editor. This gives you full flexibility over where your email collection form appears homepage, sidebar, footer, or landing pages.
Placement plays a big role in conversion. Forms placed above the fold (visible without scrolling) typically perform better. You can also use multiple forms throughout your site, each pointing to the same or different Mailchimp lists depending on your campaign goals. Keep the design clean, use persuasive text around the form (like “Join our newsletter”), and ensure the submit button is clearly visible.
Finally, test the page where the form is embedded to make sure it displays properly across devices. A broken or misplaced form will lose you subscribers.
Steps:

- Copy the shortcode of your form from Contact > Contact Forms.
- Go to Pages > Add New or edit an existing page.
- Paste the shortcode where you want the form to appear.
- Add a heading or message above the form for clarity (optional).
- Click Publish or Update the page.
- Visit the page on the frontend and check form visibility.
Step 6: Style the Contact Form for Better Appearance

By default, Contact Form 7 uses your WordPress theme’s styling. While that ensures consistency, it may look too plain or not align with your site’s brand aesthetics. A well-designed form boosts trust, improves user experience, and encourages more submissions. You can customize your form’s appearance using WordPress custom CSS.
To start, inspect the form structure. Contact Form 7 applies standard CSS classes to elements like .wpcf7-form, .wpcf7-text, .wpcf7-submit, and so on. Using these, you can define your own colors, fonts, spacing, borders, and even transitions. For example, you might want rounded corners, larger text, or a contrasting submit button.
Use the Additional CSS section in your theme’s Customizer to preview and apply your styles without editing theme files directly. You should also check how the form looks on tablets and smartphones to ensure responsiveness.
Steps:
- Go to Appearance > Customize > Additional CSS.
- Use CSS classes like .wpcf7-form, .wpcf7-text, .wpcf7-submit, etc.
- Apply styling for colors, font-size, padding, border-radius, etc.
- For example:\ncss\n.wpcf7-submit {\n background-color: #ff6600;\n color: #fff;\n border-radius: 5px;\n padding: 10px 20px;\n font-weight: bold;\n}\n\n5. Click Publish to apply the changes.
- Test the form on both desktop and mobile devices.
Step 7: Test and Troubleshoot the Integration

Before going live, it’s essential to test your setup to ensure everything works seamlessly. This includes confirming that the form submission is successful, the data reaches Mailchimp, and your users are receiving confirmation emails (if double opt-in is enabled). Testing helps prevent future issues like missing leads or integration errors.
Start by submitting a dummy form entry using a test email. Log in to your Mailchimp account and check if the test entry appears in the selected audience. If not, verify your API key, list selection, and field mapping. Plugin or cache conflicts might also affect functionality so clear your site’s cache and check for plugin conflicts by disabling others temporarily.
You can also install a plugin like WP Mail Logging or WP Mail SMTP to track outgoing emails and improve reliability. Additionally, regularly monitor your Mailchimp list to ensure that subscribers are being added consistently over time.
Conclusion
Integrating Contact Form 7 with Mailchimp in WordPress is a smart and scalable way to automate your email marketing efforts. This combination empowers you to collect subscriber data directly through your website’s contact forms and seamlessly transfer it into your Mailchimp audience. For beginners and professionals alike, this method simplifies lead generation without the need for any custom coding.
By following the step-by-step process installing the right plugins, configuring the Mailchimp API, mapping fields, embedding forms, and styling them to match your design you create a solid system that supports your marketing goals. It not only saves time but ensures that every new visitor interaction becomes a potential marketing opportunity.
What’s even more effective is pairing this email marketing setup with a well-designed website. If you're using or planning to use Premium WordPress Themes, your forms and overall user experience will look polished and professional. A high-quality theme enhances trust, improves conversion rates, and ensures your Mailchimp forms integrate seamlessly into your site's layout. Together, a premium theme and a smart email marketing strategy can greatly boost your site's performance and audience engagement.
Blogs Categories
Podcast WordPress Theme (Audio Podcast 2.0)

Latest WordPress Themes


Buy All our Premium Themes just at $119
