The process to create online course website has never been easier, thanks to WordPress. Whether you’re an educator, entrepreneur, or professional looking to share your knowledge, WordPress offers the tools you need to build a professional, user-friendly platform without requiring technical expertise. In just a few simple steps, you can create a dynamic e-learning website that attracts students, manages content, and handles payments seamlessly.
This blog will walk you through the process to create online course website, from choosing the right domain, hosting and WordPress theme and plugins to customizing your site to reflect your brand. With the help of powerful tools like Tutor LMS, you’ll learn how to design captivating course layouts, set up user registrations, and even automate grading and certification.
No matter your niche be it technology, arts, business, or wellness this step-by-step tutorial is tailored to help you get your online course website up and running quickly. By the end, you’ll have a fully functional site that not only enhances your credibility but also creates a seamless learning experience for your audience. Let’s dive in and transform your knowledge into an engaging online course website today!
Steps to Create Online Course Website
The process to create online course website on WordPress involves multiple steps, from choosing a reliable and most popular WordPress hosting provider and domain name to setting up course content and payment gateways. Here's a detailed guide on how to do it:
Step 1: Choosing a Reliable Hosting Provider and Domain Name
The first step to create online course website on WordPress involves selecting a reliable hosting provider and domain name. These two components are essential for establishing a solid foundation for your website. They directly impact your site's performance, security, and branding, so choosing wisely is crucial.
Selecting a Reliable Hosting Provider

Before you can start to create online course website, it’s essential to choose a hosting provider that meets your needs. The hosting provider you select will influence key aspects of your site, such as speed, uptime, and security. For an online course platform, performance and reliability are especially important to ensure a smooth experience for your students.
Here are a few tips for selecting a reliable hosting provider:
- Performance: Look for a hosting provider that guarantees high uptime (99.9% or higher) and fast loading times. Your course website needs to be quick and responsive to prevent frustration for your students.
- Scalability: As your online course business grows, so will your website’s traffic. Choose a provider that offers scalable hosting plans to accommodate future growth without performance issues.
- Customer Support: 24/7 customer support is critical. In the event of technical issues or emergencies, having prompt assistance is essential to keep your online course website running smoothly.
- Backup Services: Automatic backups ensure that your website’s data is always safe. Opt for a hosting provider that includes this feature, so you never risk losing course content, student data, or any other critical information.
- Security: Since you will be handling personal information, payment details, and course materials, your hosting provider should offer strong security measures like SSL certificates and regular security updates to keep your website and users safe.
Popular hosting providers for educational websites include SiteGround, Bluehost, and WP Engine, all of which offer excellent performance and support for WordPress sites.
Choosing a Domain Name

Your domain name is the identity of your online course website. It should be easy to remember, relevant to your course content, and professional. A well-chosen domain name helps establish your brand and makes it easier for students to find your website.
Here are some tips for selecting a domain name:
- Keep it Simple: Choose a short, easy-to-spell name. Avoid complicated words that may confuse potential visitors.
- Make it Relevant: Pick a name that aligns with your course offerings or niche. A descriptive name helps potential students understand what your courses are about.
- Avoid Hyphens and Numbers: Hyphens and numbers can be confusing, hard to remember, and less professional.
- Check Availability: Ensure your domain name is available on popular domain registration platforms like GoDaddy or Namecheap.
Once you’ve secured both your hosting provider and domain name, you’ll be ready to move on to the next step installing WordPress.
Step 2: Installing WordPress

Installing WordPress is a crucial step when you want to create online course website. WordPress is known for its user-friendliness, making it an ideal platform for beginners and experienced users alike. To get started, follow these simple steps:
- Access Your Hosting Account: Log into your hosting account where you’ve purchased your domain and hosting plan. Hosting providers such as SiteGround, Bluehost, or WP Engine offer easy access to cPanel or their custom control panels, where you can manage your website’s settings.
- Install WordPress: Most hosting providers offer one-click installation of WordPress via the control panel (such as cPanel). Look for the WordPress installer, often labeled as "Install WordPress" or "One-click WordPress Installer." Click "Install" to begin the process.
- Choose Your Domain: During the installation, you’ll be prompted to choose the domain name for your website. Select the domain that you’ve already purchased for your online course website.
- Set Up Your WordPress Admin: You will be asked to create a username, password, and email address for your WordPress admin panel. This is crucial for managing your site, so make sure to keep this information secure.
- Complete Installation: After the installation process is complete, you’ll receive login credentials to access the WordPress admin panel.
Once WordPress is successfully installed, you can begin to create online course website!
Step 3: Finding the Right LMS WordPress Theme
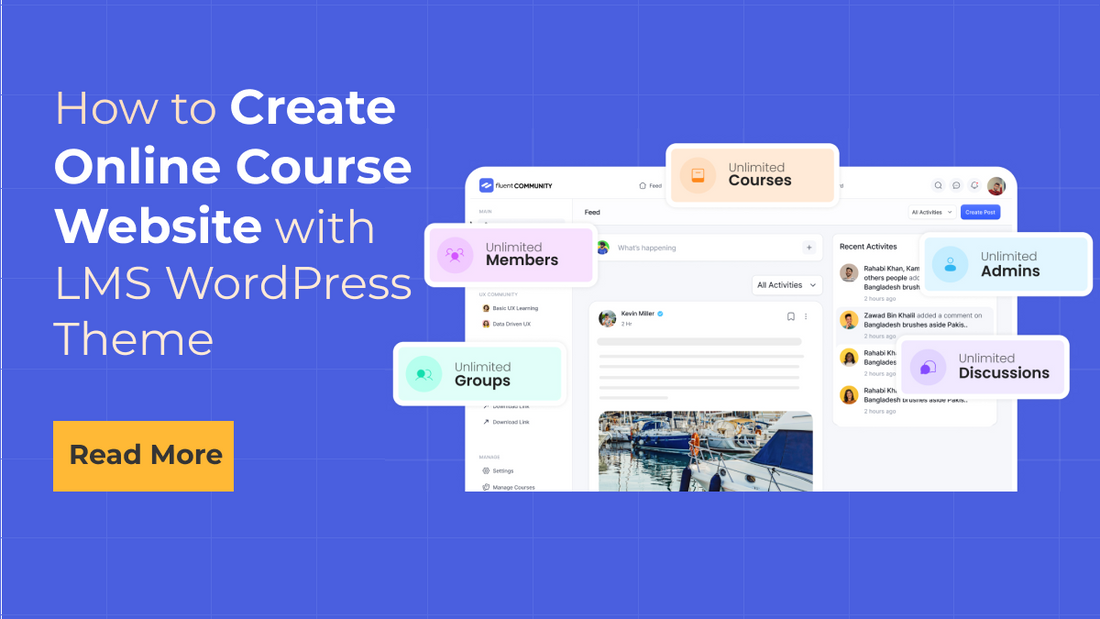
Choosing the right Learning Management System (LMS) theme is crucial when you plan to create online course website. The theme you select will determine how well your site functions, how it displays content, and the overall experience your students will have. While there are hundreds of best LMS themes for WordPress available, one standout option is the VW Themes LMS WordPress Theme.

This theme is designed specifically for creating educational websites, similar to platforms like Coursera or Udemy. It's feature-rich, responsive, and SEO-friendly, ensuring your courses are easy to find and look great on any device. Additionally, it integrates seamlessly with Tutor LMS, a powerful plugin that helps manage courses, students, and instructors efficiently. This integration is essential for creating a user-friendly and professional online course website. We have also compared the Tutor LMS vs Learnpress to see which one is the best one to create a perfect LMS website for your institute.
Key features of the VW Themes LMS WordPress Theme include:
- Responsive Design: Ensures your courses look great on all devices, from desktops to mobile phones.
- SEO-Friendly: Optimized for search engines, helping your courses rank higher and attract more students.
- Tutor LMS Integration: Simplifies course management, making it easy to add and manage content, track student progress, and handle instructor assignments.
- One-Click Demo Import: Allows you to set up a fully functional site quickly, complete with sample courses, images, and content.
- Cost: At $59, it's an affordable investment for a feature-packed theme.
This theme is perfect if you're aiming to build a comprehensive e-learning platform, offering a smooth, professional experience for both instructors and students.
Step 4: Install and Activate the Theme and Demo Import

Once you've purchased the VW LMS WordPress Theme, the next crucial step to create and sell online courses website is to install and activate the theme, followed by importing the demo content. This ensures that your website has the structure, design, and sample content similar to the demo, making it easier to customize.

- Download the Zip File: After purchasing the theme, you will receive a ZIP file containing the theme files. This file includes all the necessary components for the theme to function properly on your website.
- Go to WordPress Dashboard: Log in to your WordPress admin panel by visiting yourwebsite.com/wp-admin. This is where you can manage all aspects of your site.
- Install the Theme:
- Navigate to Appearance > Themes in the left-hand menu.
- Click on Add New at the top of the page.
- Now click on the Upload Theme button, which will prompt you to choose a ZIP file.
- Select the ZIP file you downloaded after purchasing the VW LMS theme.
- Click Install Now to upload the theme files to your website.
- Activate the Theme: Once the installation is complete, you'll see an option to Activate the theme. Click on it to make the VW LMS WordPress theme your website’s active theme. This will immediately change your site's appearance to the new theme.

Import Demo Content: After activation, you’ll need to import demo content to quickly set up your site with courses, images, and other content, mimicking the demo version.
- Enter License Key: The theme will prompt you to enter the license key you received with the theme purchase. Enter it to verify your purchase.
- Start Demo Import: Click the “Get Started” button to begin the demo import. This will install all necessary plugins, including Tutor LMS, and import demo data like courses, images, and testimonials.
- Wait for Demo Import to Complete: Depending on your server speed, the demo import process may take a few minutes. Once completed, your website will be populated with all sample content, which you can now customize with your own courses and branding.
By following these steps, you can efficiently create online course website with a polished, professional look, ready to showcase your courses to students.
Step 5: Customizing Your Courses

After importing the demo content, your WordPress website will come with sample courses that you can use as a foundation. Now it’s time to start customizing these courses or create your own content to tailor the website to your needs.
- Go to the Tutor LMS Menu: First, navigate to the Tutor LMS menu in your WordPress admin panel. This is where you can manage all course-related content.
- Add New Course:
- From the Tutor LMS menu, click on Courses, then select Add New to create a new course.
- Fill in the course title, a detailed description, and select a pricing model. You can choose between offering the course for free, as a paid course, or as part of a subscription plan.
- Set the Course Curriculum:
- Now, add the course structure by including lessons, quizzes, and modules. This helps organize your course and gives students a clear learning path. Each lesson can have detailed content, such as videos, readings, or assignments.
- Add Additional Course Details:
- What Will I Learn?: Include a short list of the key learning outcomes, highlighting what students will gain from the course.
- Target Audience: Specify who the course is designed for (e.g., beginners, professionals, etc.).
- Total Course Duration: Estimate the time it will take to complete the course.
- Materials Included: List any resources or materials such as PDFs, slides, or additional readings.
- Requirements/Instructions: Mention any prerequisites or special instructions for students.
- Publish Your Course: Once all the necessary details are added, click Publish to make your course live on your website. Repeat this process to create additional courses as needed.
By customizing your courses, you’ll be able to offer a tailored learning experience for your students.
Step 6: Setting Up Payment Gateways

Once your courses are set up, the next crucial step to create online course website is configuring payment gateways. Payment gateways allow you to collect payments from your students, enabling you to monetize your courses effectively. VW Themes LMS integrates seamlessly with Tutor LMS, one of the best lms plugins that supports multiple payment gateways such as PayPal and Stripe, two of the most popular and trusted options for online transactions.
To set up the payment gateways, follow these steps:
- Go to Tutor LMS Settings: In your WordPress admin panel, navigate to Tutor LMS > Settings > Monetization. This is where you will configure all payment-related settings for your courses.
- Set up Payment Methods:
- PayPal: To enable PayPal payments, enter your PayPal account details in the provided fields. This will allow students to pay via PayPal during the checkout process.
- Stripe: For credit card payments, configure your Stripe account by entering the necessary credentials. Stripe is widely used for processing card payments, making it a convenient option for your students.
- Configure Payment Settings: Customize your payment settings according to your business needs. Set the currency that matches your course prices, adjust payment options, and include any applicable taxes for different regions or countries.
- Test Payments: Before you go live, it’s essential to thoroughly test the payment gateways to ensure smooth transaction processing. Conduct test purchases to verify that both PayPal and Stripe are functioning correctly and securely.
Setting up payment gateways properly ensures that your students can easily enroll in courses and make payments seamlessly, which is critical to create online course website.
Step 7: Customizing Other Website Content

After setting up your courses and payment gateways, the next step to create online course website is to personalize and customize other important aspects of your site. This helps create a more professional, branded, and user-friendly experience for your visitors. Here’s how you can go about it:
- Logo: Your logo is a key part of your brand identity. To upload your logo, go to Appearance > Customize in your WordPress dashboard. From there, you'll find the option to upload your logo image. Make sure your logo reflects your brand and aligns with the overall look and feel of your online course website.
- Website Content: Update the essential pages like the homepage, about page, terms of service, and privacy policy. The homepage is often the first impression for your visitors, so make sure it clearly communicates what your online course website offers. The about page should explain your mission, vision, and expertise. Terms of service and privacy policy pages are legally necessary, particularly when you collect user data and process payments.
- Images: Replace the default demo images with your own high-quality, relevant images. This includes banner images, course preview images, and any visuals that enhance your website's aesthetics. Well-chosen images make the website more engaging and visually appealing.
- Contact Details: It’s important to make it easy for your users to contact you. Update the contact section with your business email address, phone number, and a contact form if necessary. This ensures users can easily reach out with inquiries or support requests.
Customizing these elements is crucial for making your online course website look professional, trustworthy, and aligned with your brand. For beginners it isn't really hard but if you are still facing any problems during customizing your theme, then you can use our tutorial guide on how to customize WordPress theme.
Step 8: Testing Your Website and Going Live

Before you officially launch your online course website on WordPress, it's essential to conduct thorough testing to ensure everything functions smoothly for both you and your students. Here’s how to go about it:
- Test the Courses: Start by reviewing each course to ensure all the content is properly displayed. Check that the course titles, descriptions, images, and curriculum are aligned with your vision. Test all lessons and modules to confirm they are accessible and the navigation between lessons is seamless. Ensure that quizzes, assignments, and other interactive elements work as expected.
- Test Payment Gateways: It’s crucial to test your payment gateways (PayPal, Stripe, etc.) to make sure transactions are processed correctly. Simulate a purchase by enrolling in a course and testing the checkout process. Confirm that the correct amounts are charged, payment confirmation is received, and students gain immediate access to their purchased courses.
- Mobile Responsiveness: With an increasing number of users accessing websites on mobile devices, ensuring your site is fully mobile-responsive is a must. Check how your website looks and functions on different devices, such as smartphones and tablets. Verify that all buttons, menus, and content display correctly and are easy to navigate.
Once you've completed these tests and everything is working as expected, it's time to go live! Announce your launch across your marketing channels, such as social media, email newsletters, and partnerships, to attract your first students and build your online course community.
Conclusion
Creating an online course website has never been easier with the right tools and guidance. In this blog, we explored 8 simple steps to Create Online Course Website, from selecting a reliable hosting provider and domain name to customizing your courses and setting up payment gateways. By following these steps, you can establish a fully functional, professional, and engaging platform to deliver your courses to learners worldwide.
One of the key components of this process is choosing these premium WordPress themes, and the LMS WordPress Theme by VW Themes is an exceptional choice. It offers a seamless blend of functionality, responsiveness, and ease of use. Integrated with the powerful Tutor LMS plugin, this theme makes managing courses, instructors, and students a breeze. Its one-click demo import ensures quick setup, while its SEO-friendly design helps your website rank higher in search results.
Take the next step in your e-learning journey and bring your vision to life with the LMS WordPress Theme. Start today and transform your ideas into an impactful online course website!
Blogs Categories
Podcast WordPress Theme (Audio Podcast 2.0)

Latest WordPress Themes


Buy All our Premium Themes just at $119
