Why Would You Go For HTML To WordPress Conversion?
The first thing that comes to mind when we think about HTML WordPress conversion is why is there even a need to do this when you already have a static HTML site. Well, WordPress makes it very easy and simple for beginners to manage their site and this is such a big reason to switch to WordPress. For those who are not aware of the coding stuff, you need to hire developers if you have an HTML site. And to keep yourself in the top positions in the SEO, you will need to keep updating your site consistently. This is where WordPress comes in handy. It can be used by anyone irrespective of the skill level and it is easy to do the changes in just a few clicks.

What Does HTML To WordPress Conversion Mean?
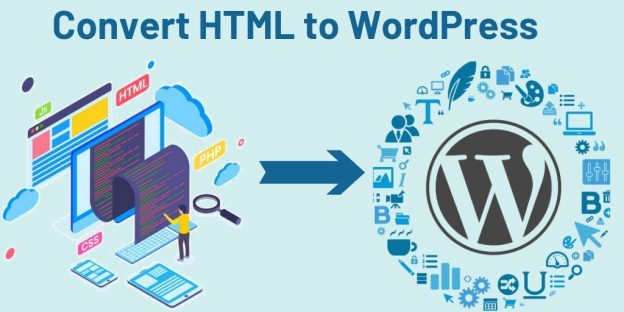
Converting your existing website into WP means taking all the data from the existing static HTML site and transferring all that stuff into a WP theme.
You can do this in three ways. In this post, we will discuss all three methods.
1. Importing Content From HTML to WordPress Using A Plugin
This is the easiest way to do it. However, this method is recommended only if you are ready to change the design of your website. Here is a step by step guide for you:
Step 1: Set Up A New Website
Start with a new site and install any WP theme of your choice. Just ensure that it is a template of your choice and can be easily edited as you will need to change the appearance to match it to your brand.
Step 2: Plugin Installation
Now you need to install the plugin. Search for the plugin “HTML Import 2” and install it on this new site. After installation, activate it.
Step 3: Upload The Pages
After the plugin is successfully activated and running, upload your pages to the same server as your WP installation.
Enter the information given below under the Files tab:
Directory To Import- it is the pathway you copied the existing HTML code to.
Old site URL- it is mostly for redirect purposes. Enter your site’s old URL.
Default File- Enter index.html
File Extensions To Include- all the extensions of the file you want to import.
Directories to Exclude- anything that you don’t want to include from the old site.
Preserve File Names- the plugin will use the file names as the new URLs automatically.
After this, under the Content tab, you need to configure the HTML tag holding the content of your site.
You have to get familiar with a few tabs:
You will let the plugin know how your titles are marked in the HTML template under the Title and Metadata tab.
All the data that needs to be imported is put in the Custom Fields tab.
In the Categories and Tags tab, you assassin categories to the content you have imported.
In the tool screen, you can go over some built-in tools found in the extension.
After going through every tab, save your settings and click on Import Files.
2. The Manual Method for HTML To WordPress Conversion
This is the most technical option and is usually not recommended for everyone.
Here is how HTML WordPress conversion can be done manually:
Step 1: Creating a New Theme Folder
On your desktop, create a new theme folder. Just think of it as a directory folder on your desktop and it serves the same purpose. Navigate to the code editor and create text files. You have to create five different files:
- Style.css
- Index.php
- Header.php
- Sidebar.php
- Footer.php
Step 2: Copying CSS Code
You will need to copy the CSS coding from your old website onto a WP Style Sheet. For doing this, first, you need to prepare a WP style sheet i.e. the style.css file you have created in the previous step. Then copy and paste the CSS code into that style sheet from your old site’s source. Fill in the various parts of the stylesheet header for your new theme. These are:
- Theme name
- Theme URL
- Author
- Description
- Version
- License, License URL, Tags.
Once done with a header, you can paste the CSS code from your static HTML website into your file. Now, save the file in your theme and close it.
Step 3: Separate The Existing HTML
As WordPress makes use of PHP for accessing the database info, so your HTML code has to be broken into pieces that make WordPress CMS easily string them together. For this, you need to copy the parts of the original HTML document into many different PHP files.
First, open your index.html file. Go through the WP files created and copy that code to the following places:
Header.php – before the section marked </head>, you need to copy paste <?php wp_head();?>
Header.php – This entails everything from the beginning of your HTML code up to the main content area. Right before the section marked </head> you’ll have to copy and paste <?php wp_head();?>
Sidebar.php- all the codes from the section marked <aside> are put here.
Footer.php- you need to add a call for <?php wp_footer();?> before you close the bracket with </body>.
Now close the index.html file and save your other data to the theme folder.
Except for the header.php and index.php, close the remaining files.
Step 4: Changing The Index.php and Header.php files
The next thing you need to do is to change the header.php and index.php file to fit to WordPress’s format. For this, in the <head> section, look for a link looking like:
<link rel=”stylesheet” href=”style.css”>.
now, replace that link with <link rel=”stylesheet” href=”<?php echo get_template_directory_uri(); ?>/style.css” type=”text/css” media=”all” />.
Save and close this header.php file for now.
Now open the index.php file and it should be empty. Enter the following things precisely:
<?php get_header(); ?>
<?php get_sidebar(); ?>
<?php get_footer(); ?>
In the space between the first and second lines of code, you paste your loop code. Save and close the file. After this, the basic theme can be expected to be ready and can be added to the new WP site.
Step 5: Create Screenshot and Upload
Create a screenshot of your theme and then upload it. The screenshot shows a preview of the site in the WordPress backend. Crop this screenshot to 880×660 pixels and save that file as screenshot.png. Add this screenshot to the theme folder.
Now upload the theme to WP and for this:
- Create a zip file.
- Go to WP
- Appearance>Themes>and click on Add New. then click Upload Theme.
- now upload the zip file of the theme and click install.
And you are done.
3. HTML WordPress Conversion Using WP Child Theme
It is way easier than the manual method. For this, you use a ready-made theme. Adjusting the design of your WP parent theme is possible to make it resemble the old site as nearly as possible. This means that you will be able to retain the look and feel of your original site and still be able to make use of WordPress. You don’t need to add the WordPress features after as you are creating a new site on an existing theme. A child theme modifies the parent theme according to your required specifications for the site.
Step 1: Select a Theme
You need to pick a theme to get started. Finding something similar to your existing design will be more helpful. Then install and activate the theme on your WP site.
Step 2: New Theme Folder Creation
Like the previous method, you have to create a new folder on your desktop. Then, name the folder the same as the parent theme and then add “-child” to its end.
Step 3: Creating Style Sheet
Refer to the similar process we discussed in the previous method. The only difference here is that you need to add a tag titled ‘template’. To make your child theme work, make sure that you add the name of your parent theme.
Step 4: Creating Functions.php
To inherit the parent styles for the child theme, create a functions.php. To create this, make a new file and name it functions.php. Be sure to begin with <?php. Then put up the code given below:
function child_theme_enqueue_styles() {
$parent_style = ‘parent-style’;
wp_enqueue_style( $parent_style, get_template_directory_uri() . ‘/style.css’ );
wp_enqueue_style( ‘child-style’,
get_stylesheet_directory_uri() . ‘/style.css’,
array( $parent_style ),
wp_get_theme()->get(‘Version’)
);
}
add_action( ‘wp_enqueue_scripts’, ‘child_theme_enqueue_styles’ );
Step 5: Activating Child Theme
Before you activate the child theme, ensure that you take a screenshot to be featured on the WP backend.
Now create a zip file that includes everything in it and add that file to WP similar to what we did in the previous method. You can then change the design to match the original HTML.
To Conclude:
The above-discussed methods give you a fair idea about HTML to WordPress conversion. Converting the HTML site to WordPress will make managing your site much easier and convenient.
WordPress Themes are on sale on our website. Checkout today to get them all in heavy discounts. Also, our best WP bundle is available at just $99.


