The digital age has brought us to a point where a strong online presence can make or break your small business. In today’s competitive market, having a website is a necessity. It’s your virtual storefront, your 24/7 salesperson, and your primary tool for reaching and engaging with potential customers.
But fear not, aspiring entrepreneur! Gone are the days of needing a degree in computer science or a hefty budget to create a professional website. With platforms like WordPress, building a website for your small business is easier and more accessible than ever before.
In this comprehensive guide, we’ll walk you through the process of creating a website for your small business using WordPress, the world’s most popular content management system. Whether you’re a budding entrepreneur or an established business owner looking to expand your online presence, this step-by-step tutorial will equip you with the knowledge and tools you need to succeed.
Together, we’ll create website for small business that not only showcases your products or services but also captivates your audience and drives your business forward.
Let’s Create Website for Small Business in 9 Simple Steps:
1. Select Domain Name & Hosting Service:
Selecting the perfect domain name and hosting service is akin to choosing the ideal location and foundation for your small business’s digital storefront. Let’s take a closer look at each step:
Choosing a Domain Name:
Your domain name is not just an address; it’s your brand’s digital identity. Here’s how to choose wisely:
- Relevance: Ensure your domain name aligns with your business name or core offerings. The domain name should be simple to spell, pronounce, and recall.
- Keywords: Using appropriate keywords can enhance your website’s presence in search engine listings.
- Extension: While .com is the most common, consider other extensions like .net or .org if they better suit your business.
- Availability: Verify that your desired domain name is available and doesn’t infringe on trademarks.
- Longevity: Choose a domain name that will remain relevant and timeless as your business grows.
Selecting a Hosting Service:
Your hosting service is the engine that powers your website. Here’s what to look for:
- Reliability: Opt for a hosting provider with a reputation for high uptime and minimal downtime.
- Performance: Speed matters. Choose a host that can deliver fast loading times to enhance user experience and SEO rankings.
- Scalability: Your hosting needs may evolve as your business expands. Ensure your provider offers scalable options to accommodate growth.
- Security: Protect your website and customer data with robust security features like SSL certificates, firewalls, and regular backups.
- Support: Seek a hosting provider with responsive customer support to assist with any technical issues or questions.
2. Install WordPress:
Here’s a comprehensive overview of the steps involved:
- Access Your Hosting Account: Log in to your hosting account’s control panel using the credentials provided by your hosting provider.
- Locate the One-Click Installer: Look for the one-click installer tool within your hosting control panel. It’s often labeled as “Softaculous,” “QuickInstall,” or similar.
- Select WordPress: Find WordPress from the list of available applications within the one-click installer interface.
- Start the Installation Process: Initiate the installation process by clicking on the WordPress icon or link.
- Configure Installation Settings: Fill in the required details, such as site name, description, admin username, and password. Ensure your password is strong and secure.
- Choose Installation Directory: Decide whether to install WordPress in the root directory or a subdirectory of your domain.
- Finish the Installation: Press the “Install” button to initiate the installation procedure. The installer will handle setting up the necessary files and database.
- Confirmation and Login Details: Once installation is complete, you’ll receive confirmation along with login details for your WordPress dashboard.
- Access Your WordPress Dashboard: Log in to your WordPress dashboard using the provided credentials. Here, you have control over every aspect of your website.
- Explore and Customize: Familiarize yourself with the dashboard and its features. Customize your site’s appearance, install plugins, and create content to tailor your website to your business needs.
3. Select a WordPress Theme:
Selecting the best WordPress theme is a crucial step in the process to create website for small business. Your theme not only dictates the overall look and feel of your site but also influences its functionality and user experience.
When choosing a WordPress theme for your small business website, consider factors such as:
- Design and Layout: Look for a theme that aligns with your brand aesthetic and business goals. Consider the layout options, color schemes, typography, and overall design elements that will best represent your business.
- Responsiveness: Ensure that the theme you choose is mobile-friendly and responsive across various devices and screen sizes. With an increasing number of users accessing websites on smartphones and tablets, responsiveness is essential for providing a seamless user experience.
- Customizability: Opt for a theme that offers a high level of customization options. This allows you to personalize your website to suit your specific needs and preferences without needing advanced coding knowledge.
- Support and Updates: Choose a theme from a reputable developer or marketplace that provides regular updates and customer support. This ensures that your theme remains compatible with the latest version of WordPress and helps if you encounter any issues.
There are many free and premium WordPress themes available, but to create website for small business, it’s important to choose a theme that is professional, responsive, and customizable. Now, let’s explore these suitable WordPress themes for small businesses:
a) Business Consultant WordPress Theme:
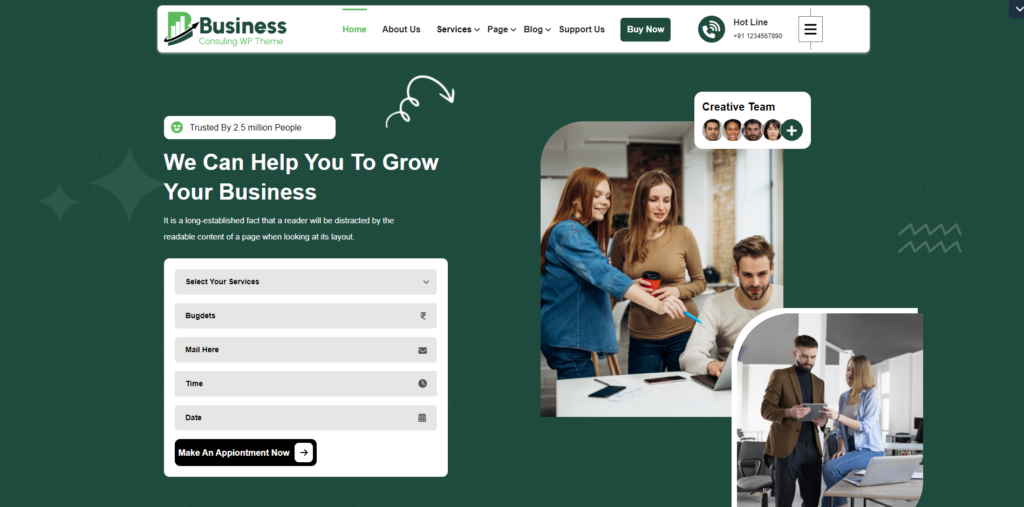
Investing in the WP Business Consultant WordPress Theme is a smart choice for professionals and advisory firms looking to stand out online. This top-notch theme is designed to boost your consultancy to new levels. It offers easy customization options, so you can make your website unique to your brand. Plus, it comes with built-in e-commerce features, making it simple to sell services directly from your site. With a responsive design, your website will look great on any device, from computers to smartphones. And if you ever need help, their customer support team is here for you. Choosing the WP Business Consultant WordPress Theme means getting a comprehensive and modern solution. With its advanced features and support, it helps consultants thrive in the competitive online market and showcase your expertise and services effectively.
b) Startup WordPress Theme:

The startup WordPress theme comes packed with special features to boost its performance. You can easily customize every part of the theme, from the header to the footer, colors, backgrounds, and more. This makes your website feel unique and close to your heart. Customizing is a breeze through the theme options panel, saving you time and effort. You can instantly see the changes you make using the Customizer API. Plus, the theme is designed to load quickly. It’s simple to install, set up, and make small tweaks, even without reading the documentation.
Choose from various page layouts and templates, including boxed or full-width designs. Experiment with unlimited colors and over 100 Google Fonts for a modern look. When you become a premium member, you’ll get access to regular theme updates and one year of support. Short-codes are available for adding special features to widget areas, such as testimonials, galleries, and subscription forms, making it ideal for showcasing your products or services and attracting potential investors or clients.
Business Theme Bundle:

Why choose the Business Theme Bundle? It’s simple. This bundle packs a punch with themes tailored to create website for small business, offering a host of features to get your site up and running smoothly. In short, the Business Theme Bundle offers everything you need to create a professional, functional, and visually stunning website for your business all at a fraction of the cost of buying individual themes. It’s a win-win for your business and your budget.
4. Install and Activate Your Theme:
Once you’ve selected a theme, you’ll need to install and activate it on your WordPress dashboard. Here’s a guide:
- Access Your WordPress Dashboard: Log in to your WordPress admin dashboard by adding “/wp-admin” to your website’s URL and entering your credentials.
- Navigate to the Themes Section: Once logged in, head to the “Appearance” section in the dashboard’s sidebar and select “Themes.”
- Choose Your Theme Installation Method:
- WordPress Theme Directory: If your preferred theme is free and available in the WordPress Theme Directory, click “Add New,” search for the theme, then hit “Install” and “Activate.”
- Upload Theme: For premium or third-party themes, choose “Upload Theme,” select the theme’s .zip file from your computer, click “Install Now,” and then “Activate.”
- Activate Your Theme: Upon successful installation, click the “Activate” button to set your chosen theme as the active design for your website.
- Customize Your Theme (Optional): Explore customization options such as colors, fonts, and layout variations. Navigate to “Appearance > Customize” to access these settings.
- Preview Your Changes: Utilize the WordPress customizer to preview adjustments before applying them permanently. Make necessary tweaks until you’re satisfied.
- Save Your Changes: Once satisfied with your theme’s appearance, click “Save & Publish” to ensure your customizations are applied and saved.
5. Import Demo:
Many WordPress themes come with demo content that you can import to help you get started with your website. It involves importing pre-designed content, including pages, posts, images, and layouts, that comes bundled with your chosen theme. This feature is particularly helpful for beginners, as it provides a ready-made foundation to work from.
To import a demo:
- Access Theme Options: Navigate to Appearance > Themes in your WordPress dashboard.
- Install Your Theme: If you haven’t already, upload and activate your chosen theme.
- Import Demo Content: Look for an option like “Demo Import” or “One-Click Demo Import” in your theme’s settings.
- Choose and Import: Select the demo that matches your preferences and follow the prompts to import it.
- Wait and Review: The import process may take a few minutes. Once done, review the imported content to ensure everything looks as expected.
- Customize: With the demo content imported, you can now customize your website to fit your brand and needs.
6. Customize the Content as per Requirement:
After importing the demo content, it’s time to customize your website to reflect your brand and business offerings. It is vital for effectively conveying your brand message and engaging your audience. Here’s how to do it:
- Define Your Brand Voice: Determine the tone and style of communication that aligns with your brand identity.
- Homepage: Craft a compelling headline and introductory text, accompanied by high-quality images or videos that showcase your offerings.
- About Us: Share your business story, team bios, and any relevant credentials to build trust with your audience.
- Product/Service Pages: Provide detailed descriptions and use engaging visuals to highlight the benefits of your offerings.
- Contact Information: Make it easy for visitors to reach you by including contact forms and essential contact details.
- Call-to-Action (CTA) Buttons: Use clear and persuasive CTAs to prompt visitors to take the desired action.
- Mobile Responsiveness: Ensure your website looks and functions well on all devices, enhancing user experience.
- SEO Optimization: Incorporate relevant keywords into your content to improve your website’s visibility in search engine results.
7. Install and Activate WooCommerce Plugin:
If you plan to sell products or services online, you’ll need to install and activate the WooCommerce plugin, which is a powerful e-commerce solution for WordPress.
It transforms your WordPress website into a fully functional online store. Here’s a simplified guide:
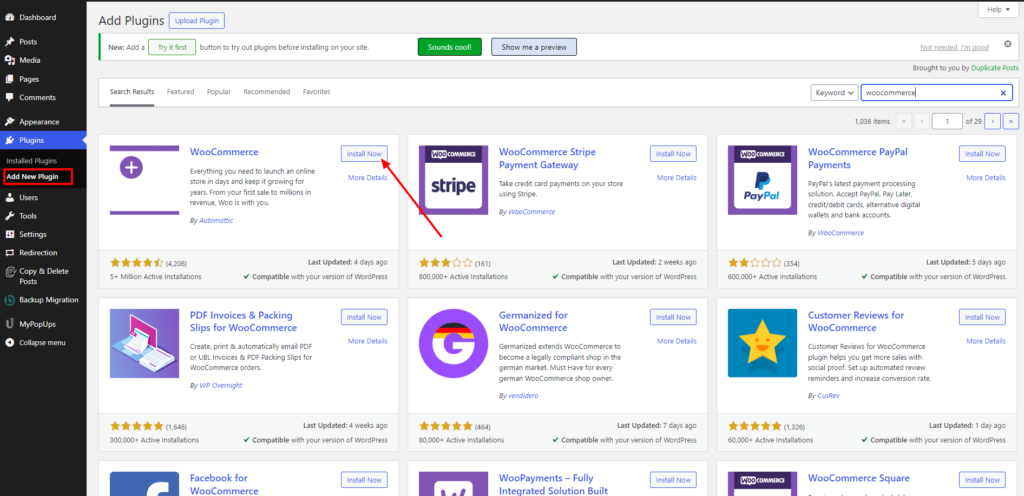
- Access Plugins: Log in to your WordPress dashboard and navigate to the “Plugins” section.
- Search for WooCommerce: In the “Add Plugins” page, search for “WooCommerce” using the search bar.
- Install and Activate: Click on the “Install Now” button next to WooCommerce, then activate the plugin.
- Setup Wizard: WooCommerce offers a setup wizard to guide you through the initial configuration. Follow the prompts to set up your store details, payment methods, shipping options, and more.
- Customize Settings: Once activated, customize your store settings as per your business requirements. Adjust product, tax, shipping, and payment settings via WooCommerce > Settings in your dashboard.
- Add Products: Begin adding products to your store by navigating to Products > Add New. Fill in product details such as title, description, price, and images.
- Test Your Store: Before going live, thoroughly test your store’s functionality. Check the checkout process, payment gateways, and product pages to ensure a seamless experience for your customers.
8. Add Products:
With WooCommerce installed, you can start adding products to your online store to complete the process to create website for small business. Here’s how you add products to your website:
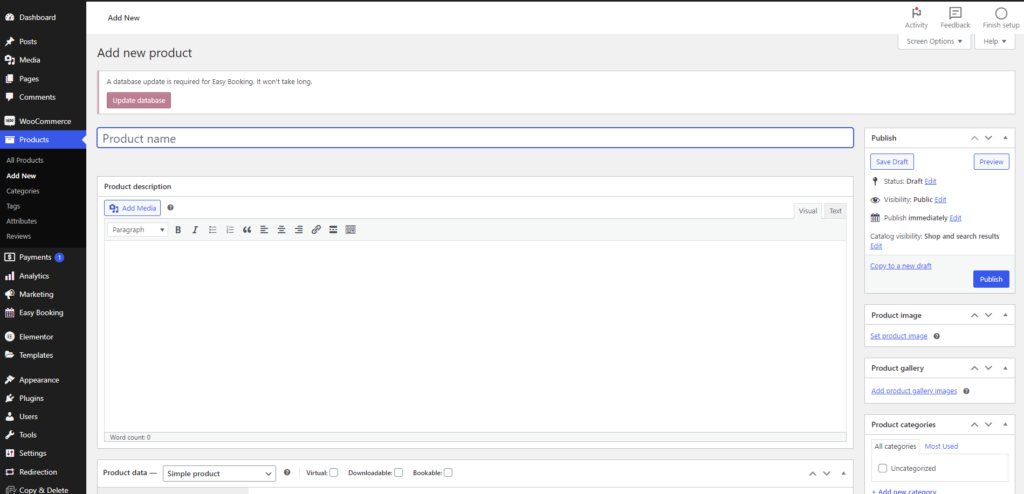
- Access your WordPress Dashboard and navigate to WooCommerce.
- Set up product categories for organization (optional).
- Click on “Products” > “Add New” to create a new product.
- Enter product details such as name, description, price, etc.
- Configure product settings including categories, tags, and inventory management.
- Add product attributes for variations (optional).
- Set a featured image to showcase your product.
- Publish the product or save it as a draft.
- Repeat the process for additional products.
9. Launch Your Website:
Once you’ve customized your website and added your products, it’s time to launch your website and make it live for the world to see! It is the final step in the process of creating a powerful online presence for your small business. Here’s how to ensure a successful launch:
- Double-Check Everything: Review all aspects of your website to ensure everything is functioning properly.
- Test Across Devices: Ensure your website looks good and functions well on different devices.
- Optimize for Speed: Use tools to test and optimize your website’s speed for better user experience.
- SEO Optimization: Incorporate relevant keywords and meta tags to improve your website’s visibility in search engine results.
- Secure Your Website: Install security measures to protect your website from potential threats.
- Backup Your Website: Create a backup of your website to safeguard your data.
- Announce Your Launch: Share the news on social media, via email newsletters, and update your business listings.
- Monitor Performance: Track website metrics to assess performance and make necessary adjustments.
Conclusion:
In conclusion, create website for small business in WordPress has never been easier, especially with the WordPress bundle offered by VW Themes. Whether you’re a local shop, freelancer, or service provider, the user-friendly interface and customizable options of WordPress, combined with the versatile designs and features of VW Themes, make the process smooth and efficient. With the WordPress bundle, you not only get access to a powerful website-building platform but also a selection of professionally designed themes tailored to suit your business needs. From showcasing your products and services to engaging with customers and boosting your online presence, creating a standout website for your small business is now within reach, thanks to WordPress and VW Themes.


