Introduction
Owning a car sales and dealing business is not easy; everything needs to be maintained well. This is not for a single person to handle everything.
Then there is the thought of getting a website and enrolling in the digital market. Well, that’s the only way you can secure a great place and generate good revenue for your business. A website is not just a place to sell and buy things, but a complete gateway to uplift your business.
Most owners turn off their ideas for designing a website just because of a lack of design skills. But we are here for you with this ultimate guide to making a car selling website on your own. Trust me, this blog will tell you how to create a selling website without using any codes. Stay tuned!
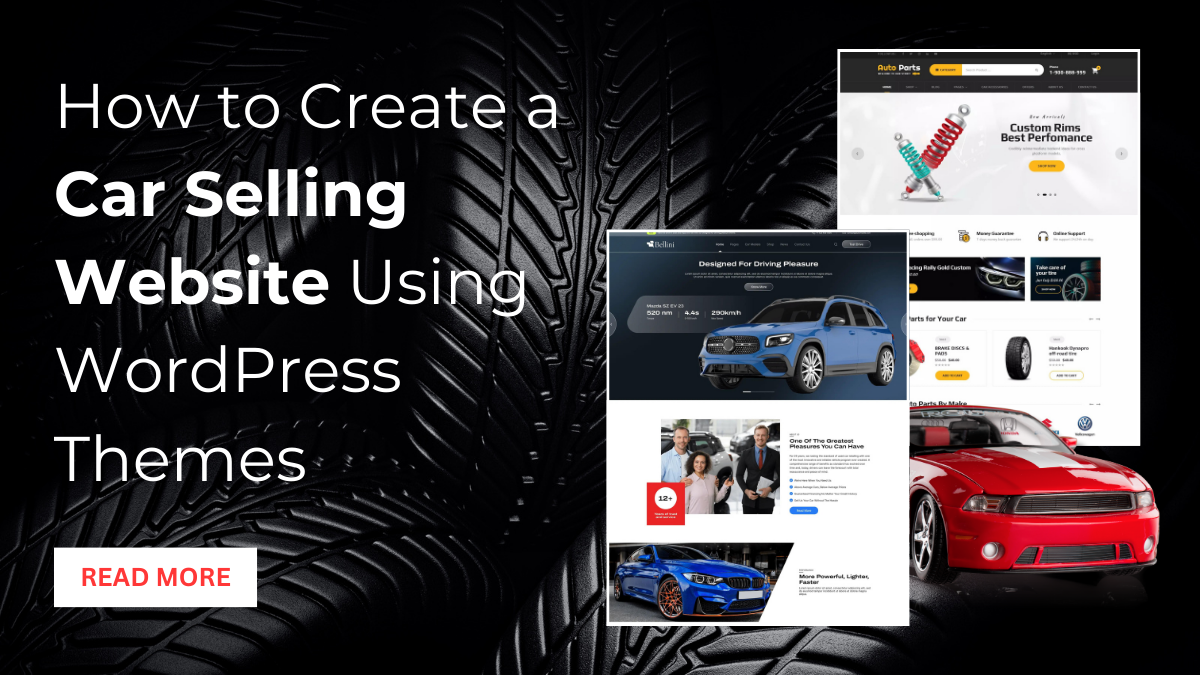
Create a Car Selling Website on WordPress: Step by Step Guide
Listed below are some steps that makes your website development easier. Let’s start, shall we?
- Set up hosting and the domain
- Install WordPress
- Get a Car Selling WordPress Theme
- Add content to your website.
- Setup Woocommerce
- Add products to your website.
- Setup Shipping and Payments
- Launch your website.
1. Set up hosting and domains for your site.

The initial stage of making a car selling website involves enrolling in the digital world by acquiring a domain and hosting service.
- Domain: It’s the unique address that establishes your brand identity on the web, typically starting with “www” and ending with extensions like “.com,” “.in,” or “.co.” Ensure it doesn’t contain special characters or uppercase letters.
- Hosting: This provides server space for storing your website’s data files, serving as the complete home of your site. Look for reliability, speed, and security, with updates for PHP and HTTPS versions.
- Providers: Various certified domain providers like GoDaddy, Bluehost, and NameCheap offer assistance in acquiring suitable domains. Similarly, reputable hosting providers ensure optimal performance for your website.
- Bluehost: Known for reliability and performance, it often offers a free domain for a year, along with SSL certificates. Choosing a plan and domain is straightforward through their website.
- Registration: After selecting a plan, you’ll set your domain name and complete the purchase by providing billing and account details.
Upon completing the purchase, you’ll receive login details and can proceed to install WordPress for website development using best WordPress themes.
2. Install WordPress
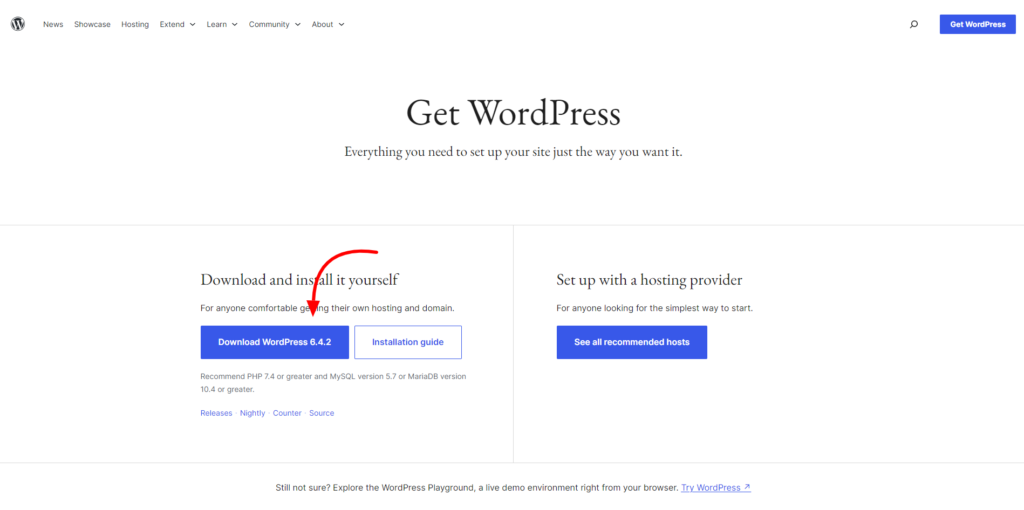
When you have the right hosting and domain, you can now install WordPress easily. And let me tell you that Bluehost, being the most certified and popular hosting, gets WordPress installed automatically for you. Yes, this is possible. What you need is to simply tap on the Bluehost login link given in the email. Once tapped, you will reach the Bluehost control panel with already installed WordPress. If this doesn’t happen, then simply reach the control panel of Bluehost and tap the Add Site button in the right corner.
Once done, Bluehost will guide you to install WordPress, followed by a button on the next screen. Then choose a title and enter the domain you have chosen for your site. This will complete the installation process, and your new website will be created.
3. Get a Car Selling WordPress Theme
Now that you have a blank WordPress website ready, it’s time to get a theme to make your site live. A theme is the most important asset while getting a website ready, which determines the overall presence of your site. A theme is a set of templates, code files, and stylesheets to build a website. While building a car website, it is required to choose a theme that uplifts your niche. By default, WordPress comes with a theme pre-installed on your site. You can either customize it or switch to a new theme.
It is highly suggested that you get a new theme that resembles your niche. We are heading toward building a car selling website with WordPress. So, you must know that WordPress is a complete directory of highly-qualified themes for different platforms.
Among the various platforms selling out their themes in the market, getting that one theme from a certified place is crucial. But we are making your thing easier.
Presenting the two most qualified and ranked most popular car-selling themes by VW Themes. Their themes appear on your website in a way that professionals do. They are well-qualified in terms of functionality, appearance, and design. You can also checkout our automobile theme bundle that consists of themes for automobile niche. This bundle has a curated list of themes with best functionalities and design layouts. So get yours now!
a) Garage WordPress Theme
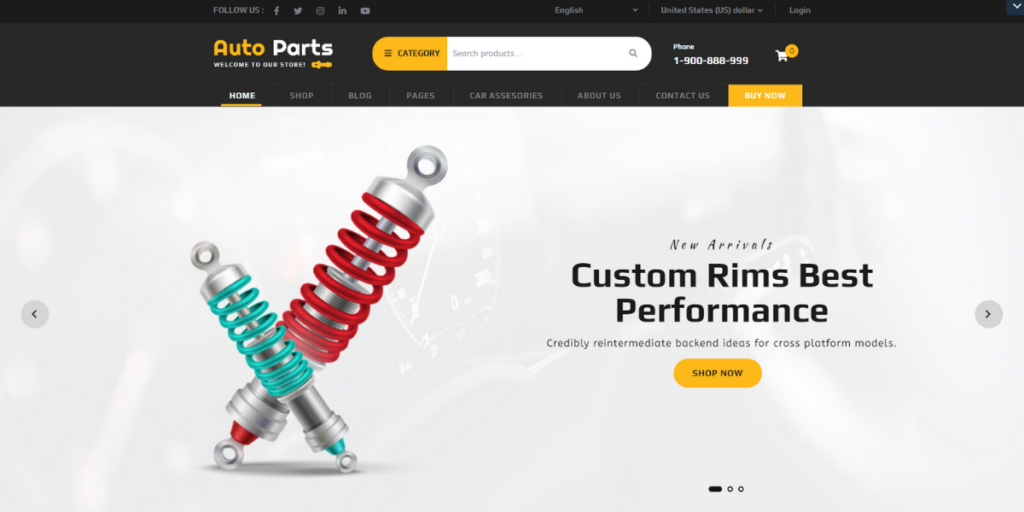
The premium Garage WordPress theme gets its place among the topmost themes for car-selling businesses. Those with car selling, dealing, auto parts, and rental businesses can surely go for this theme. The theme holds a creative range of templates and theme elements to cater to the best design. It comes with a super responsive interface that works well on every screen size. Also, the interface aligns with any popular browser type. The theme caters to smooth navigation by offering sliders and sidebars on the website. It has a clean background design filled with enticing menus and navigation controls for smooth conversions. It is powered by SEO optimization, making your car selling site rank well on search engines. The theme further integrates with WooCommerce and other vital plugins. There are customizing elements that can be easily added using drag and drop.
b) Car Dealership WordPress Theme
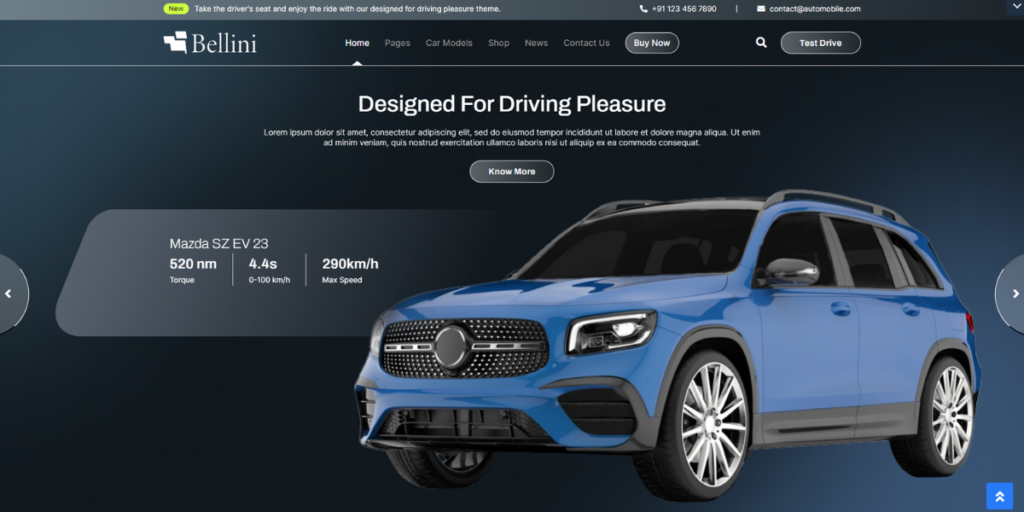
Bringing on another best-quality theme to build a car-selling website using WordPress. This is the Car Dealership WordPress Theme that gives you the best-in-class features and templates. The theme is built using the latest WordPress versions, giving you the trendiest features for your site. The theme has a clean and captivating background design filled with easily clickable menus. The entire interface can be easily customized by beginners without using any codes. Plus, there is a unique set of customizable templates, making web design easier. The templates are further filled with pre-designed inner pages for your car selling website. The theme integrates with a useful range of plugins, including WooCommerce. Also, it is SEO-optimized so that your website ranks well on search engines. You can build customized pages, add elements, or edit using drag and drop. Also, there are social media icons to help you promote your site on social platforms.
Install the WordPress theme
Once you have decided which theme to put in to make a car selling website, let’s install it on your site.
- To install a WordPress theme, you first need to visit the theme page that you have selected for your site.
- Then, by scrolling a little, tap the Buy Now button, and the next page is to complete the purchase by filling up the account details.
- Put in the correct details and complete the theme purchase. Once you are done, the theme’s zip file will be downloaded to your device.
- Now head back to your WordPress dashboard and tap the Themes section under the Appearance tab.
- Again, two options will unlock: Add New and Installed themes.
- You need to choose the Add New option, and this will take you to a new screen. On the page, find the Upload File button to upload the zip file of your theme.
- Once uploaded, tap the Install button and then the Activate link on the next page.
- Once activated, you will see the actual theme page, which will appear with menus to explore. You can tap on it to install essential and integrated plugins, explore the demo content, support it, and customize it.
- To customize your theme, simply reach the Appearance tab and then the Customizer/Editor. You will reach the editor screen with different sections you can customize.
4. Add Content to Your Car Seller Website.
To add content to a WordPress site, you’ll typically include posts, pages, widgets, navigation menus, and media. Lets see the steps to add content:
Posts: These are dynamic content entries, often used for blogs, appearing in reverse chronological order. To add a post, navigate to the Posts section in the dashboard, select Add New, and use the provided blocks to create your content. Once finished, hit publish.
Pages: These are static, timeless elements of your site such as the homepage, About Us, or Privacy Policy. For adding a page, go to the Pages section under Appearance, click Add New, and utilize the feature blocks to design your page. After arranging the content, click publish.
Widgets: These are interactive elements like buttons usually found in the top menu bar. To set a custom page as your homepage, access the Reading section in Settings, select static page, then choose your desired page as the homepage and save the settings. Repeat this process to add more pages.
5. Setup Woocommerce

A plugin is one of the most essential parts of getting a website ready. These are the tiny software elements that, when integrated into a site, boost its functionality. You are making a car selling website, so Woocommerce is the essential plugin for your website. The theme that you have chosen has already integrated WooCommerce and other plugins attached. You simply need to install them while in the initial stage. In case you missed that step, you can install the plugins manually.
- To install WooCommerce on your website, simply reach the Plugins section under the dashboard area.
- You need to choose the Add New option, and you will reach the plugins directory. Here in the search panel, you need to type Woocommerce, and once found, simply install. Once done, tap the activate button.
- After the activation, the setup wizard will ask for the store location. Then select the industry type under which your brand comes. Since you are making a car website, there is no industry type there. So, you need to check the Others checkbox, add the industry type in the description box, and tap Continue.
- After this comes the kind of products you are selling, which can be physical, bookings, subscriptions, and more. You need to choose the physical products and tap Continue.
- Then the next page will ask for the quantity of the products you want to sell; simply add the quantity and continue.
- The next page will let you check the box “Add Recommended Business Features to My Site.” And lastly, tap the Continue button to finish the setup.
6. Add Products to your Car Selling Website
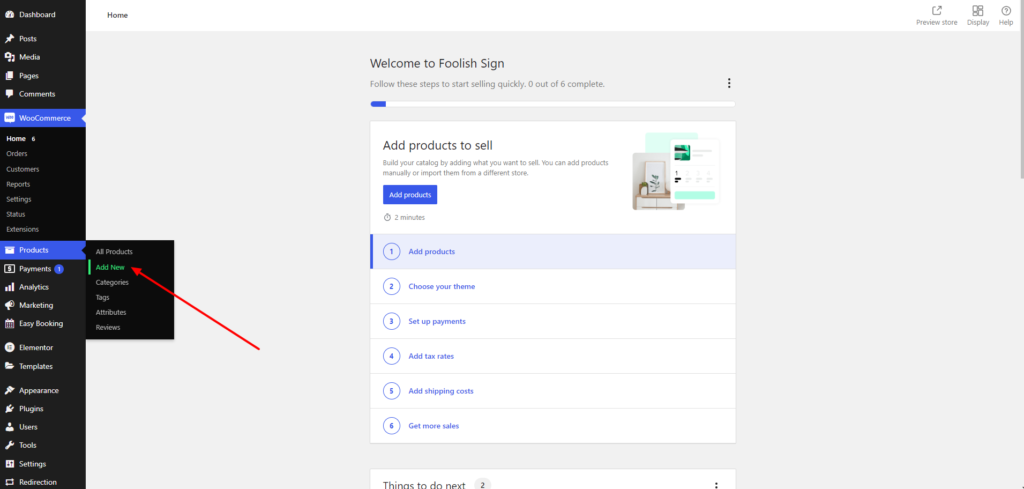
- To add products to your car website, simply visit the Products section under Woocommerce. Then tap the Add New option.
- On the new blank screen, add the title and description of your car product. You can even add images from your device by tapping the Set Product Image link.
- Also, there is a link to add categories and tags to your product.
- By scrolling down a little, you can set more options like inventory, shipping, attributes, and variations. Once you are done with all, tap the Publish button to add the product.
7. Setup Shipping and Payments
To set up shipping, tap the Settings tab under Woocommerce. Among various menus on the top bar, enable the Shipping tab. Then tap Add Shipping Zone and select the region and zone from the drop-down list. Then set the shipping method by again tapping the drop-down list. And now, finally, save the settings.
To set payments, simply switch to the Payments tab under the settings panel. You will then see a list of payment options attached to WooCommerce. Tap the Install button in front of the payment gateway. Once done, tap Finish Setup, and finally tap the Save Changes button. After that, enable the button in front of the payment gateway you want to set. This will finally set up payments to your car website.
8. Launch your car selling website.
When you are done with all the vital things for making a car website, it’s time to preview your website.
Previewing your website is vital, as you can watch out for how it is working. This is the stage where you can make changes before setting your website live on the web. You must check that all your web pages are loading correctly. Take a look at whether your website is responsive or cross-browser compatible. Also, they try to make a trial purchase so that payments and shipping are working well. Finally, when you are satisfied with it, you can take your website to its final launch.
Conclusion
Making a car website takes a lot to tackle and sum up. But with this blog, we have made it far more possible for beginners to take up their car-selling businesses on the web. The car-selling industry is taking up so much of the digital market today. This is why it is highly necessary to acquire a good online presence, even with a small car-selling business.
Our WordPress bundle provides a comprehensive selection of themes designed specifically for car selling websites, each offering unique features and customization options to suit your needs. By utilizing these themes, you can streamline the design process and create a professional-looking website with minimal effort.
This is the right time to take the step of building a car-selling and dealing website on your own. There is no need to use any coding skills or hire a developer to make a car selling website. You just need to follow the above steps, and you are good to go.


